Showing posts with label Smooch Inks. Show all posts

Monday, April 08, 2024

Manly Monday Big Blue Birthday Cake Card


I cut the cake out with my Cricut. The background was stenciled using distress ink and The Crafter’s Workshop 12x12 stencil. Then for whatever reason I covered part of the background with China Blue distress oxide. (It looks okay.) 
I added Smooch ink to the flames of the candles. The card front panel is size 4x5.5. The card base was 4.5x5.5. I cut the front and then adhered a piece of blue cardstock on the inside of the inside of the card.
Thanks for looking.

Friday, October 29, 2021

Floral Friday Sunflower card with Scraps of paper card

Sunflowers are my favorite flower. I found this image in my bin and matched it up with this background that was in another bin.
I found it colored it in with chalk and decided to enhance it with Smooch inks. Super old products. But it did the trick.
I'm entering this card into Pattie's Creation Design Challenge: Autumn/Fall


Thanks for looking.

Wednesday, September 04, 2019

A Little Something Purse card

I've been trying to find ways to use these stamps and this is another one I came up with. I stamped the squares with a variety of inks and added a die-cut by Spellbinders behind it. The purse is also a SU stamp and I colored it in with Smooches ink. The card base was stamped with a Hero Arts stamp with Versa Mark ink. I used a heat gun to dry it. I did brush some white powdered chalk on it.
The outside edges were inked with distress ink by Ranger (Spun Silk & Mahagony). 


Thanks for looking.

Here are some other attempts at using this stamp set
Burgundy Box card
Pink squares with flower

Tuesday, May 21, 2019

Deep Red Stamps Enchanting Moments Card

Start with a piece of Basic Grey patterned paper size 4 x 5 ½ and adhere to the top 3 pennants of different lengths using My Mind’s Eye patterned paper. Die cut a brown cardstock butterfly with Cricut. Stamp the Floral Mosaic background stamp (Deep Red Stamps #4x604417) with black Hero arts ink onto off white cardstock. Color in one of the flower shapes found in the background stamp, with gold Smooches ink by Clearsnap. Cut the flower shape out and ink edges with distress ink (Ranger). Adhere butterfly die cut as shown and arrange the stamped image in the center. Set a gold brad (Creative Imaginations) in the center. Add two K and Co premade flower die cuts, a chipboard sentiment by Prima and alphabet stickers by Making Memories for the word “Moments”. Adhere the front panel to an off-white card base (Recollections).


Thanks for looking.

Thursday, January 24, 2019

Blue Cake Birthday card

I made another simple birthday card. One of the background papers is by Creative Memories. The hearts patterned paper is unknown. Cake stamp by Stampin Up. Smooch Ink on the candles. Cricut sentiment.


 Thanks for looking

Tuesday, December 25, 2018

Merry Christmas! 2 cards today

Celebrate the season card
Start by making a 4 ¼  x 5 ½ red card base with cardstock by
Recollections. Dry emboss (Cuttlebug) white cardstock and adhere to the card front
to the top and center of the card base. Die cut and emboss green cardstock
(Sunborn) using the Spellbinders die and spray with Perfect Pearls mixed with
water. Die cut two different ornaments using the Cricut Expression out of
red patterned paper and white cardstock. Color the smaller die cut with
Smooch Ink by Colorbox and adhere both on top of the green die cut. Tape
a piece of cording by Darice behind ornaments and then to the back of the embossed
cardstock. Stamp sentiment (Hero Arts)with red ink (SU) and ink edges with
Barn Door distress ink. Adhere to the card front.


Start by making a 4 ¼  x 5 ½ blue card base with cardstock by Recollections
and sprayed the front with Forest Green Glimmer Mist. Die cut a
scalloped circle (Spellbinders) out of white cardstock (Recollections)
and ink the inside with Twisted Citron distress ink after embossing and
while the paper is still in the die. Die cut the Spellbinders
Shapeabilities Pendant Lotus die out of green cardstock (Sunborn).
Spray it with Key Lime Pie Glimmer Mist. Circle punch a 1 ½  out of Kraft
cardstock (Oriental Trading Company) and a 1 ¼ out white cardstock
(Recollections). Stamp the sentiment onto the smaller circle with brown ink
(Stampin Up). Ink smaller circle with Evergreen Bough distress ink making
the edges darker than the inside. Once everything dries adhere the pieces
together and onto the card front. Stamps by Clear Dollar Stamps, LLC,
Fanciful Flakes (5516). Distress ink is made by Ranger Industries.Circle
punches from Creative Memories. Glimmer Mist by Tattered Angels, LLC.


Thanks for looking.

Tuesday, March 14, 2017

5th Birthday Layout

Today I have a layout from one of the graduation books I did last year. I really liked the circles but looking at it now I think it all may be too busy. Oh well what's done is done. 

I cut the circles out with my Cricut and the George cartridge and then dry embossed them with embossing folders by Cuttlebug and Darice. The birthday cake stamp is an old one by Stampin Up. I colored in the flames with Clearsnap Smooches ink. The letter stickers are by Making Memories.


Thanks for looking.

Tuesday, January 24, 2017

Birthday Cake. Birthday Time ATC's

I created the background for these ATC's using a Tim Holtz clock stencil. I inked them with a dark purple and then went in and added the blue, yellow, and green, which are all distress inks. The cake stamp by SU was stamped in purple and I added gold Smooches ink to the flame of the candles.

The word "Birthday" is a Maya Road stamp stamped with black Hero Arts ink and the word "Time" is part of a ribbon by Queen and Co. The clock is from a piece of decorative tape that reminds me of athletic tape. I used the Ranger stapler to create the hands of the clock. The purple ribbon was white and I dyed it with either distress ink, SU ink, or Sta-On ink. I didn't have the color purple ribbon so I made my own.


Thanks for looking.
UPDATED PICS 9-2021

Thursday, January 12, 2017

Deep Red Stamps Vector Flourish card

My card today uses Deep Red Stamps Vector Flourishes stamp set. I stamped it in brown Stampin Up ink and colored in part of it with Smooches ink by Colorbox. The border is by Spellbinders out of Bazzill brown cardstock, which is the same cardstock behind the patterned paper. I think the patterned paper is by My Mind's Eye-maybe and you can correct me if I'm wrong.


Thanks for looking.

Thursday, October 27, 2016

Happy Day ATC's

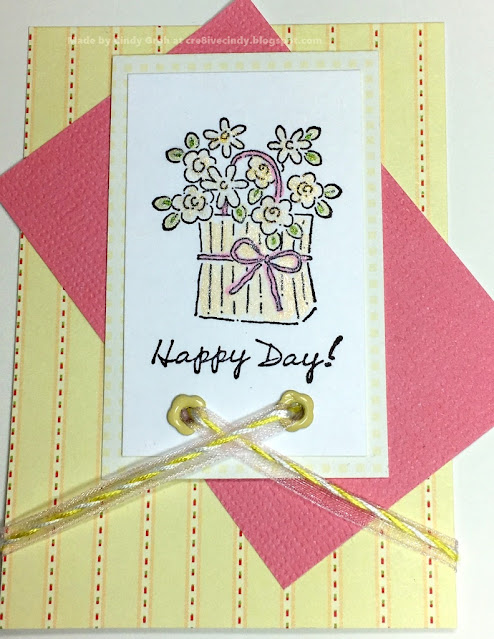
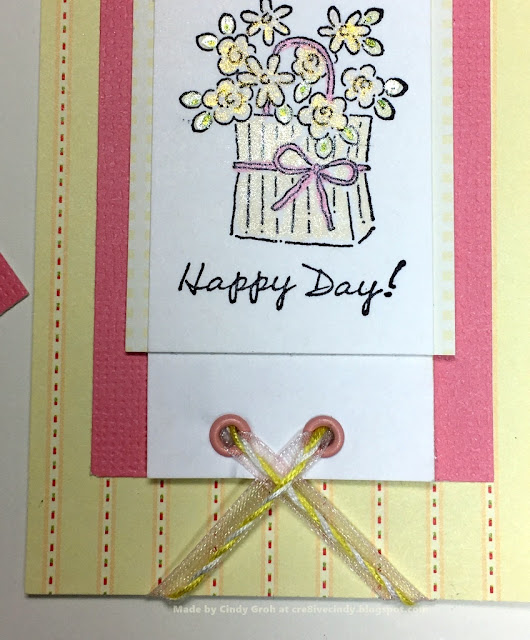
These two ATC's are for birthdays at the swap I participate in at Scrapbook.com. The stamp is very old by Stampin Up. I stamped it with Hero Arts ink and colored it in with Smooch Ink. The pink paper is by Studio G. The eyelets are by Stampin Up. I crossed the shear pink ribbon with yellow baker's twine. This was not an easy process but the results look nice.


Thanks for looking.

Sunday, January 17, 2016

Easter Layout from Jake’s book

I am making a scrapbook for my nephew and my sister has not been as organized as I would have liked her to be. So I have Easter pictures that are not dated however these ones were labeled and so I put them together in one layout. I decided that I don't have to go in chronological order. That's new to me and almost makes me break out in hives. I'm working through it and you will see that come out in the next few months. 

The patterned papers are by Making Memories and the cardstocks are by Studio G and Recollections. The title is a Cricut cut using the Cuttin Up cartridge. The center line of eggs is a bunch of different products. The orange and multiple colored small eggs were Cricut cuts but I'm not sure of the cartridge. It was a freebie on Cricut Craft Room. The pink stamped egg is a Close to My Heart stamp and the yellow and orange sparkle egg is a Studio G stamp. I colored it in with Clearsnap smooch ink and Ranger Stickles on the stars. The black stamped eggs are by Stamp N Plus stamps that I stamped with Hero Arts black ink. I colored them in with powdered chalk that I mixed with paint. Then I fussy cut the eggs out and added them to border. The eyelets are by Eyelet Outlet.


Thanks for looking.

Friday, July 24, 2015

Mermaid Card

Today's card is kind of fun a beach themed. The mermaid stamp is by Inkadinkado and I have inked it with Versa Mark ink and heat embossed it with platinum embossing powder by Ranger Industries. Then I brought in some Smooch Ink by Clearsnap to color the image in. I cut her out into a square and matted her on to the scallop square die cut by Spellbinders with Quick Quotes patterned paper. I also die cut a piece of blue fun foam with the same scallop square die cut to give it some dimension. The sort of background paper is by K and Co, the helm is die cut from my Cricut and Life's a Beach cartridge and finally the little sentiment square under the helm is by Quick Quotes. I forgot to say the card base is pre-made by recollections.


Thanks for looking.
http://toptiptuesday.blogspot.com/ Embossing. sentiment, and Die cuts
Outlawz-Water theme

Monday, April 20, 2015

Manly Monday Iris Truck

Welcome back to Manly Monday. I've gathered up a bunch of masculine cards for you. Click on the blog name to be directed to the card. 


Weren't those fabulous. I love to have all this inspiration in one spot. If you like what you see please consider following my blog.

In today's card I used an truck iris folding stamp by Stamp N Plus. 


I did the iris folding with a plaid patterned paper which isn't my favorite but it will do. The stamp was stamped with Hero Arts ink and colored in with Smooch ink by Clearsnap. I inked the edges of the truck with distress ink; Tumbled Glass for the sky and Antique linen on the road. I added gear dies by Spellbinders to the left and a Celebrate die by Die-Versions. All of the die cuts use Recollections cardstock. The patterned paper is by Die Cuts with a View.


Thanks for looking.

Thursday, December 18, 2014

Stamp N Plus Iris Bell card

New card with an iris folding Christmas bell by Stamp N Plus. I stamped it with Hero Arts black ink and did the iris fold with Karen Foster patterned paper. The edges are inked with distress ink by Ranger and the leaves and ribbon are colored with Clearsnap Smooch ink. The background paper is by My Mind's Eye and the sentiment paper is by Studio G. The sentiment is a die cut by Stampin Up.

Thanks for looking.


Challenges:
http://blog.red-rubber-designs.com/ Christmas Cheer
http://craftylittlefairieschallenge.blogspot.co.uk/ Holly and/or ivy
http://thesistersofcraft.blogspot.co.uk/ ANything goes
http://www.theeastwind.com/ Christmas
http://craftycreationschallenges.blogspot.com/ Something to die for
http://freshbreweddesigns.blogspot.com/ Christmas AG
http://lilredwagon.blogspot.com/ Anything Christmas themed
http://thepapershelter.blogspot.com/ Christmas
http://pennyschallenges.blogspot.com/ Anything goes
http://scrappers-delights-challenge-blog.blogspot.co.uk/ Anything goers
http://stampwithsarahkay.blogspot.com/ Christmas
http://stampotiquedesignerschallenge.blogspot.com/ Anything goes
http://whimsyinspires.blogspot.com/ Antyhing goes
http://kraftinkimmiestamps.blogspot.ca/ Anything goes

Saturday, November 01, 2014

Christmas Cards All Year Round November

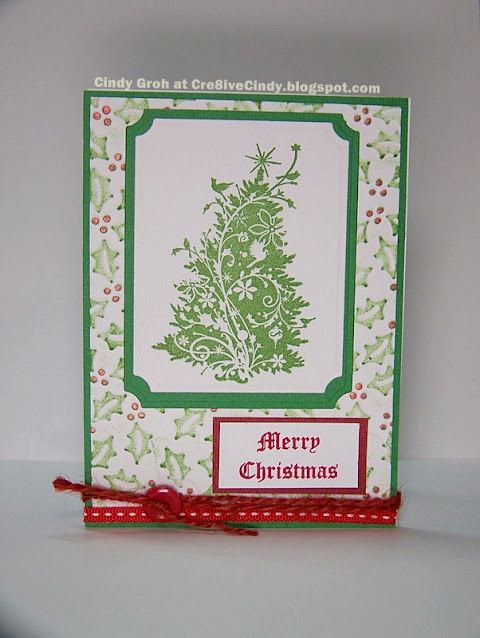
Christmas Cards All Year Round starts a new challenge today of no patterned paper on your Christmas cards.  For my card I dry embossed the holly leaves background, folder by The Paper Studio, and then I put green ink on the leaves and Smooch ink on the berries. The white cardstock is by Recollections and the green and red by Coredinations. The tree stamp is by Inkadinkado stamped with Versa Color green ink and the sentiment by Gina Marie ink Stampin Up red ink. There is a small red ribbon with a white dotted line at the bottom along with a jute by Tim Holtz and a button.

Thanks for looking.


Tuesday, June 19, 2012

Merci card

I really like this Thank You card. It is so simple yet looks so nice. The patterned paper is by The Paper studio. The embossing folder is by Cuttlebug. I used Smooch ink by Clearsnap to sort of paint the word "Merci". It makes it pop out a bit. The tag is by Basic Grey. I didn't like the pattern on the front so I flipped it over and used the white back. The rub on is by American Crafts. Cardstock by Sunborn and Hobby Lobby. Thanks for looking.

Challenges:


Saturday, March 10, 2012

Bird-day party

My mom bought me this stamp set by Layers of Color called birdday party. I've never had a stamp set by them before. I think they are nice and wanted to show you a card I made using it. 
For this card I just used the sentiment stamp from the set. It goes great with the embossing folder by Provo Craft. To get the embossed areas different colors I used Smooch ink by Clearsnap. I used different shades of green to give a shadow affect along with some dots of purple mixed in there. 
Thanks for looking.


Challenges:
http://mymumscraftshopchallenges.blogspot.com/-Spring
http://audsentimentschallengeblog.blogspot.com/-Happy Birthday (not sure this qualifies for this challenge)

Tuesday, June 28, 2011

Tuesday Post Christmas in June

A little late with the post. PT and errands to run while the ride was available.

PP by KCo and EP; corners by KCo; brads LSS; ribbon UK; sentiment by EP; and little spots of Smooch Ink on the PP and sentiment in Lame Gold by Clearsnap.
Thanks for looking see you tomorrow:)

Friday, June 24, 2011

Friday's Clearsnap project

Hey everyone,
You should head over to the Clearsnap blog for your chance to win amazing prizes from them. I wanted to show you a card I made using their products. It's a Christmas card and I know you are probably thinking it's too early for that but I have to start early or it doesn't get done the way I want it to.
For this project I dry embossed a piece of Echo Park's Merry Christmas paper with my Cuttlebug and one of their folders. Then I took the Clearsnap ink and went over each embossed piece of the embossed pattern with the ink. I love the way it turned out. Their new line of Smooch Inks are super fun and can be found at the link provided or at Michael's (I saw them at the store but can't find them online to give you a link). Before I adhered all my embellishments, I sprayed the card base with a new Smooch color for 2011 called Green Olive and then an older one called Vanilla Simmer.


Other supplies include: felt border by OTCo; sentiment by EP and card base by RE.
This next picture is a "close up" of the Smooch Ink. My close up shots are a work in progress. My camera and I need to practice at it more. But you get the idea. Have a great weekend and thanks for stopping by.