Showing posts with label heat embossing. Show all posts

Friday, July 18, 2025

Floral Friday Heat Embossed frame card


This frame die is by Scrapbooking Made Simple. I tapped the die cut with a Versa Mark ink pad. Then I added embossing folder. I added pink on the flowers and green on the leaves. It sort of worked. Thanks for looking. 


Monday, June 16, 2025

Manly Monday E=Mc2 Graduation card


This is a Craft Roulette card episode #259. The parameters were: a card with two folds, Math, and markers. The color parameter was Jelly beans. The colors are too loose meaning you could use any colors. So, a Zoom group and I pull a card out of the Color Cube and make that the color parameter. I like more of a challenge. Idk. 
My card is a matchbox card. The background, E=Mc squared stamp is by Deep Red Stamps. I stamped it with black ink and blended my background with distress oxides. The grad cap was made with my Cricut. The sentiment die is by Spellbinders, and the sentiment is from Stamps of Life. The ribbon is from Michael's. I colored the white line in the middle with a Copic marker.
Thanks for stopping by.

Monday, February 10, 2025

Manly Monday Frog and Lizard card


I stamped and then heat embossed a variety of different stamps leaf stamps onto green cardstock. I cut it out with a Creative Memories wavy square shape. I inked the edges and adhered it to the card base (4x5.5)
The frog and lizard were both heat embossed with platinum embossing powder by Ranger. I colored them with Copic markers, fussy cut, and then adhered them to the background. The lizard is on foam tape. The sentiment is Lawn Fawn. Thanks for looking. HAGD! 
I'm entering this challenge into:
The Male Room-Monochromatic

Monday, January 06, 2025

Manly Monday Cheers to the New Year

Happy new year with a Craft Roulette card Manly Monday style. It’s from episode #246. The parameters were:

Project-holiday card

Color-Trees

Element-Drinking vessel

Random-something from your floor.

Thursday, December 12, 2024

Peace, Love and Joy Big card


This card is from Craft Roulette #244.

 The parameters were:

Project-Joy fold

Color-Bold/cold

Element-family 

Random-ribbon 

The gold paper, letter dies and the white die cut layered at the bottom of the cluster are from Sizzix. The embossing folder is by Gina Marie. The die cut that the ampersand sign is on is by Creative Expression. There’s Rick Rack on the left side of the card on top of a snowflake background stamp that I heat embossed in green embossing powder.  The joy tags on the right are sewn up there with not twine, but like hemp ribbon. 
It’s a very heavy card. I would probably have to add extra postage. Thanks for looking.


Monday, October 14, 2024

Manly Monday Double Sophisticated cards


I cut out both of the silhouettes using my Cricut. 

The card on the left: 

The white colored patterned paper Recollections and the dark patterned paper is by Die Cuts with a View. 

The Fiskars Stamped sentiment I heat embossed it in white. 

I cut the gentlemen's silhouettes die cuts on my Cricut.


The card on the right:

The patterned paper is by Adorn It and Stampin Up. 

Stamped sentiment is by Hero Arts. 

I popped up the die cut with foam adhesive. 


 Thanks for looking.

Friday, September 13, 2024

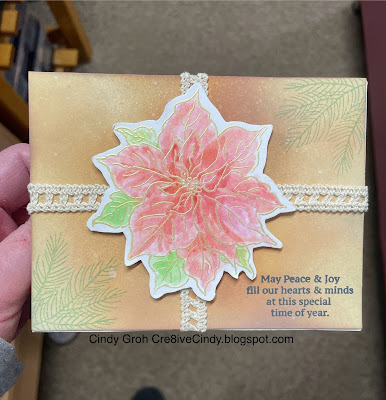
Floral Friday Oxide background Poinsettia Christmas


I made this card for Craft Roulette #206. The parameters were: Project-card with a heart (the word heart is in the sentiment). Colors-vintage (I think it looks vintage). Element-plant (pontisettia). Random- lace in the base (there’s lace on the card base.).

 I started by stamping a bunch of panels with the poinsettia in the center and the sprigs in the corners. I colored this one with Copic markers but hated it so I heat embossed another one on watercolor paper and colored it in with watercolors. I dislike this one too. But due to time constraints, I had to go with it. 

So what is it that I don’t like about the new flower? There's no definition that the flower has petals. There’s no dimension. When you have different shades of colors added you can look as though one petal is under another. 

Anyway, I created the background with distress oxide and spritzed it with water. Then I added pre-adhesive lace to make it look like a present.
CS-Hobby Lobby
Watercolor CS- Tim Holtz
Distress Oxides
Stamps-Stampendous
Copics and Zig markers
Lace-Recollections

Thanks for looking. HAGD! 

Sunday, September 08, 2024

Pastel Butterfly Cards


I white heat embossed the butterflies and colored them in with Copic markers. Butterflies and sentiment stamps are by Stampendous.
I used the same patterned paper as my first layer. Even though it's mostly covered up it pulls out the little bit of color in the butterflies. The patterned paper pad is from Hobby Lobby. (I should use it more).


The diagonal design border on this second card is washi tape by 3M. It's a pain to get off the roll because it's fragile and the stickiness isn't consistent. I almost had it to the size I wanted and it ripped. Oh, Come on!!
 The lace is from Scrapbooking Made Simple, the oval die cut is by Spellbinders, and the celebrate die is by Couture Creations.
Thanks for looking.

Monday, August 14, 2023

Manly Monday Curtains are open for the Nutcracker


The card is for Craft Roulette challenge
Parameters: 
Split down the center-curtains made by me. 
Jolly colors-jolly red with blue and green Christmas colors.
 Fruit-nuts are a fruit (nutcracker Cricut draw and cut. Colored with Copic markers)
A Heart-on his hat-die cut by Scrapbooking Made Simple. Thanks for looking.

Thursday, June 15, 2023

Hearts on a String Card


This is an upcycled image from grandma’s house. I think there was a distant cousin that made cards and grandma kept all of the cards she received. Awww. The stamped image has been black heat embossed and colored in with markers. Then the red background was dry embossed with a Spellbinders double embossing folder. 

Thanks for looking.

There was some yuck on one of the corners so I added the corner tabs to each of them by using a square punch out the red cardstock and then cut it in half. That will give you the same sized triangles for each corner.

The only explanation why my corners are all different sizes is I was using a small and limited piece of paper and my square punch sizes were different. So I was cutting them in half at different points.

Monday, May 23, 2022

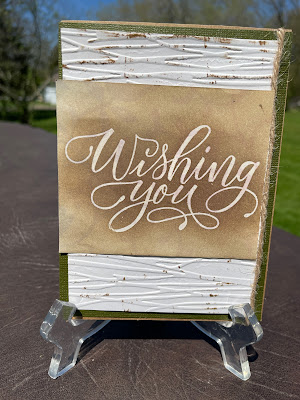
Manly Monday Wishing you Card with a Promoted Woodgrain Embossing folder

I really like the way this card came together. The sentiment is heat embossed with clear embossing powder. Then I inked it with distress ink. The background paper and the jute are by Tim Holtz. The white cardstock has been dry embossed and then I would place a Gathered Twigs mini distress ink cube on top of the embossed area wait a few and then lift it straight up and place it on another spot. Let it sit for a moment or longer if I forgot about it and then again lift straight up.

Two things to note, I have shaky hands that jerk. <ClicK>  The jerking hands has been a problem when I’ve pressed send before finishing or proofreading a text or message. <ClicK> We’re back. Point is, my hand didn’t jerk sending the ink cube flying across the embossed background and/or across the room landing ink pad side down on the carpet. Second, it’s amazing that I didn’t drop the ink cube on the embossed paper. Thanks so much for stopping by. I have cards and layouts to post but injuries have prohibited me from going downstairs to my supplies and my PC. I now understand why people give up crafting if they don’t have a dedicated room to do so. You get I your stuff out and then have to put it away for dinner. It’s really hard to get your craft on that way. Thanks for looking.

Friday, October 22, 2021

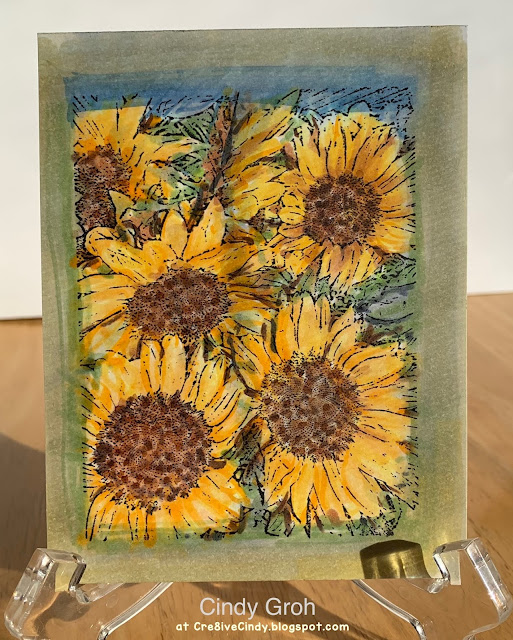
Floral Friday with Sunflower Backgrounds by Deep Red Stamps

I colored in these sunflower backgrounds last year.
I love how they turned out.
 I haven't made them into cards because I don't want to cover up the beauty of the flowers.
See below for the cards.
This is a Deep Red Stamp 


This thing is so old and I was able to use it. It's by Provo Craft.

The below background is MIA

Thank for looking

Friday, October 15, 2021

Floral Friday Sunflower Border Cards

The sunflower border is from a friend. I colored it in with regular chalk.
The patterned paper is by Tim Holtz.
The sentiment is by Bo Bunny. I white heat embossed it.


I used the Same pad of Tim Holtz paper for the circle. The background paper and paper behind the border are by Basic Grey 


Entering into the challenge

Thanks for looking 

Friday, October 08, 2021

Floral Friday Sunflower Tag card and older SU Sunflower stamp card

The tag for this card is an upcycle. It was made by a family member named Dawn and it was given to Grandma LaFrate in 2016 (I think-SMH. I thought I took a picture of the back so I would be able to reference it. I can't find it.)


So all I did was ink the Provo Craft patterned paper with distress ink,
Heat embossed the sentiment stamp by Forever in Time, inked it, and punched it out. 
The circle underneath is a Recollections journal box. I used a Spellbinders die to cut it out and then inked it. The first time I inked it in Vintage Photo and I did;t like it, I flipped it over and inked it with Peeled Paint.
The sentiment is on Zots 3D dot thingy's that I fought with and won't use them again for a circle punch. I thought that since they were round that would work better than the square dimensional adhesive. Not so much. It looks warped. Oh well.

This next card was also made by Dawn. I took the top of this handmade card and cut off the dirty sides. Then I added the panel onto this store-bought card because it matched so beautifully.


The card below uses a very old Stampin Up stamp set and a Close to my Heart sentiment. 


I used perfect pearls on the sunflower. The patterned papers are by Studio G (orange check) and Studio Calico (woodgrain). The die-cut behind the sunflower is by Spellbinders.
Here is a link to the other place I used this same stamp.
Dec 2011 Calendar LO

Monday, October 04, 2021

Manly Monday Deep Red Stamps Woodgrain

I made these cards using the Deep ReD stamps 
I heat embossed the weathered wall stamp. I had to stamp it twice to fit on the cardstock. I used my MISTI and I was successful. I used Peerless Watercolors to color in the cornucopia.
They are so messy because I kept falling asleep while painting these. I would wake up and the paintbrush would be in the wrong spot for that color or on the outside of the image. I used paper towels to get rid of the access but it didn't always save the image. Oh well. I think they still look nice...from a distance. lol


The red border and brown border sticker are by Creative Memories and Yellow unknown.


The border die is by Tim Holtz


This is the size of the weathered wall stamp and the size of the cardstock. You can tell that the MISTI really came through for me when it came to perfectly lining up the image. 


Thank you for looking.
Here are a few previous posts that go along with these two.

Friday, August 27, 2021

Online Card Class Day 3 Pleating Christmas tree card

Online card Class day 3

The stamps are by MyStamp Box
This was the best of 4 tries at weaving. However, I glued the woven piece on the wrong side of the card.

Thanks for looking

Thursday, August 12, 2021

You Look Fabulous...Given How Old your Are cards

You look Fabulous cards. 
The stamp Film stamp set is by Deep Red Stamps
The sentiment is by Stampendous


The sentiment was heat embossed in gold.


The dry embossed background on the card below the image is by Darice. I like the way I did the first card with the film strip better because I stamped it out on white and fussy cut it out. That way I was able to line up the pattern unlike the ones below. Oh well.


Thanks for looking