Showing posts with label sequins. Show all posts

Thursday, April 03, 2025

Stencil Background Butterfly card

I made this card using a stencil by Scrapbooking Made Simple and distress inks. The butterflies are dies by Poppystampss. Then I added small sequins to the the body of the butterfly. They are by Fun Stampers Journey. The sentiment die is by Die-Versions. Thanks for looking.

Saturday, October 12, 2024

4 Snow Globe Shaker Christmas Cards

The snow globe die cuts were cards that I cut apart. They came to me in the stash of the older woman that I was lucky enough to receive her Christmas card making supplies after she had to go to a nursing home. 


The background of this card was made with distress ink and water and maybe some kind of spray/spritz. I dry embossed the red part with a Cuttlebug embossing folder and in an effort to make it look brown I continued to add distress oxide to it. Meh. The sentiment stamp is by Inkadinkado. 


For this card, my background paper is by Carte Bella.  The sentiment is by Inkadinkado. The scene is made up of stamps from Stampendous.


For this card, my background paper is by.  The sentiment is by Inkadinkado. I love that name. The scene inside is made up of stamps by Stampendous.


The background of this card was made with a stencil by The Crafter’s Workshop, distress ink, and Glimmer Mist spray by Tattered Angels. The sentiment is by Hero Arts. The scene is made of stamps by Lawn Fawn that were colored in with Copic markers. Thanks for looking. HAGD! 

Sunday, May 19, 2024

Fancy Fold with Kites card for a co-worker

Card standing upright 

This card was made for the challenge at 
Craft Roulette. The parameters were:
Project-A card for a co-worker (I made this for my cohort. We came up with, 5on5. It’s where we make 5 Christmas cards on the 5th of each month at 5pm)
Colors-kites in the sky (my sky is blue.)
Element- April (I made the same fancy fold for my husband, who’s birthday is in April)
Random-Sparkles (sequins in the bike.)

Card laying down 
All of the patterned paper including the designs happy mail, bicycle and the Unique in the right corner are by My Mind’s Eye 6x6 patterned paper pad. I added yellow sequins by Fun Stampers Journey on the wheels.

 
This is the card folded up and ready to be mailed.
The happy mail stamp is by Lawn Fawn and is stamped with Hero Arts ink. (The post card is from the paper padlock) The sun is a Cute Clip by Doodlebug Designs (Sunny Skies) and inside of the sun is a clear yellow enamel dot. 

 
One more photo of it upright at a different angle.
Thanks for looking and HAGD

Friday, January 05, 2024

Pink Floral bouquet shiny Upcycled card


The floral bouquet covers up a 25. It is an upcycled wedding table card that I thought would be worth a try. The floral is a die cut by my friend Rosie. I added a few sequins and then the title is a die cut by?? I have so many new die cuts that I can’t keep track of the companies.


This is the wedding number that I covered with the bouquet. Pretty good.

P


So then I made this second card green. So on this cardI made my own background. I used a Stampin Up background stamp on cream card stock. Then I added distress ink around the edges. This bouquet is foiled. 
Thanks for looking. 

Thursday, June 30, 2022

Brown Graduation card with center PP highlight with a Copic marker

This graduation card was made with someone in mind and then I couldn't find it. So, He got a different card. The background paper is by The Paper Studio AKA Hobby Lobby. The center piece of paper is by Best Creations. The graduation caps didn't stand out enough so I traced around them with a fine tip Copic marker.  I finished the card with a few stars sequins. Thanks for stopping by.

Thursday, May 19, 2022

Green shaker card birthday card

I’ve been nursing a few injuries, sprained ankle and bruised my butt when I fell straight down on it.  I went to sit down on a new to me walker. I was told by my ex SIL, “you have to have a walker” AKA She wanted the walker out of her house. But really she was a hero for helping by giving it to me. It was the walker’s wheels that made me fall. You could say it walked away from me. I landed right on my ass. I’m not complaining but the two injuries make it hard to craft. Here are just some facts: 1. I’m a fall risk and I can’t go downstairs. 2. I can’t give a clear answer as to where the pain is in my ass-which makes me feel like a pain in the ass. 3. I want to stand up to take the pressure off of my butt pain. However, I want to sit down because of my ankle pain. The butt pain has won that competition and I’m standing. 4. Lastly, the topic on weather or not I should go to the doctor for the ass has been a hot debate. Anyway. I brought some up some half done projects and have been able to put some things together. This is one of them. Thanks for looking.

Tuesday, March 08, 2022

Snowman Merry Christmas Card

I know very little about this card because I bought the snowman and the sentiment stamps in a bundle without packaging. The patterned paper at the bottom was left from having a friend 4 years ago. I did die cut that paper and a piece of white glitter cardstock underneath it with an eBay die The small little snowflakes are sequins made by American crafts. thanks for looking 

Tuesday, January 11, 2022

Christmas tree with oval wood Frame card


I used a Tim Holtz stencil with distress ink and oxide for the sunshine rays.
The tree is an upside-down pennant stamp that was heat embossed in that funky color. I added the yellow with Copic marker. Other things I added were a stamped tree trunk, a star sequin, and iridescent small "sequins" for lack of a better word. I've had them forever.

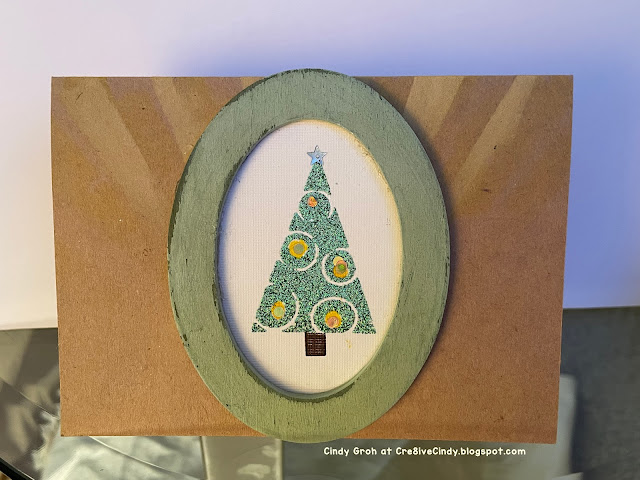
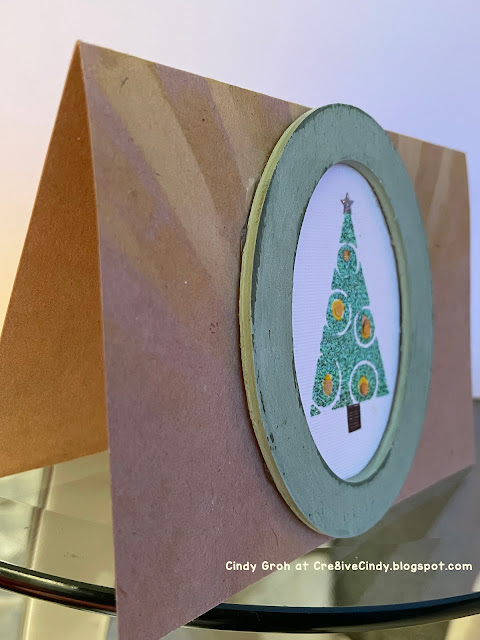
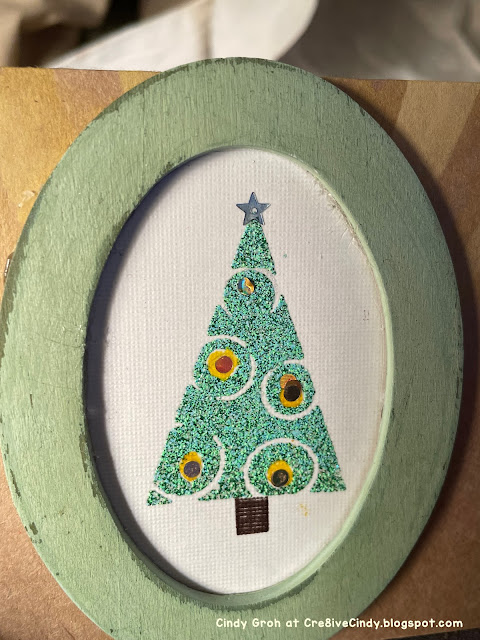
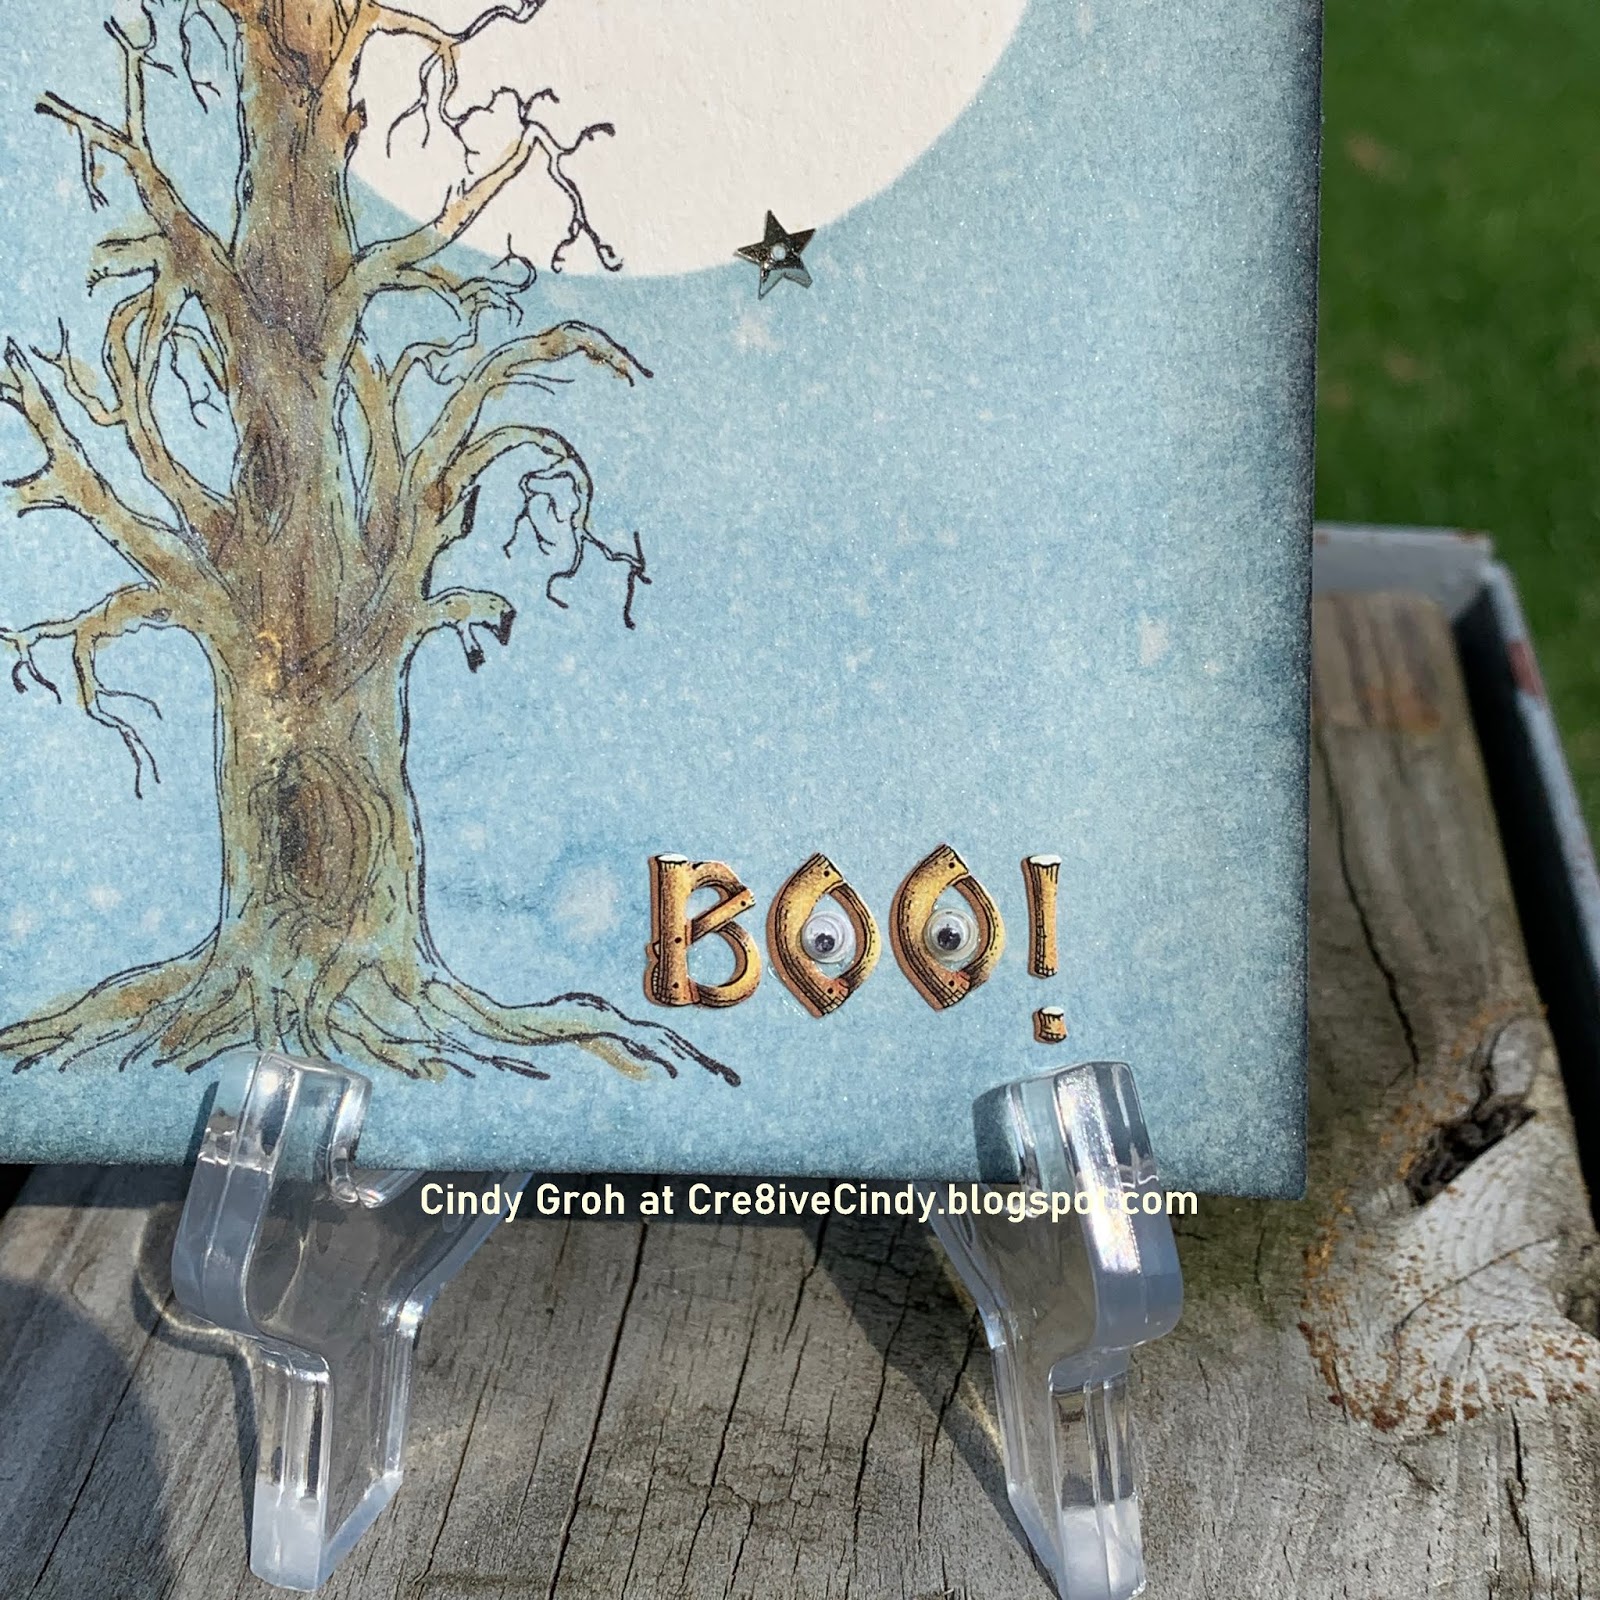
The frame is an oldie that I found from my stash. I painted it and distressed it with an emery board. I was just playing around with it as a prototype for another project but don't ask me what that was.

Thanks for stopping by.

Monday, December 06, 2021

Manly Monday Joe's 40th birthday card with Eyelets

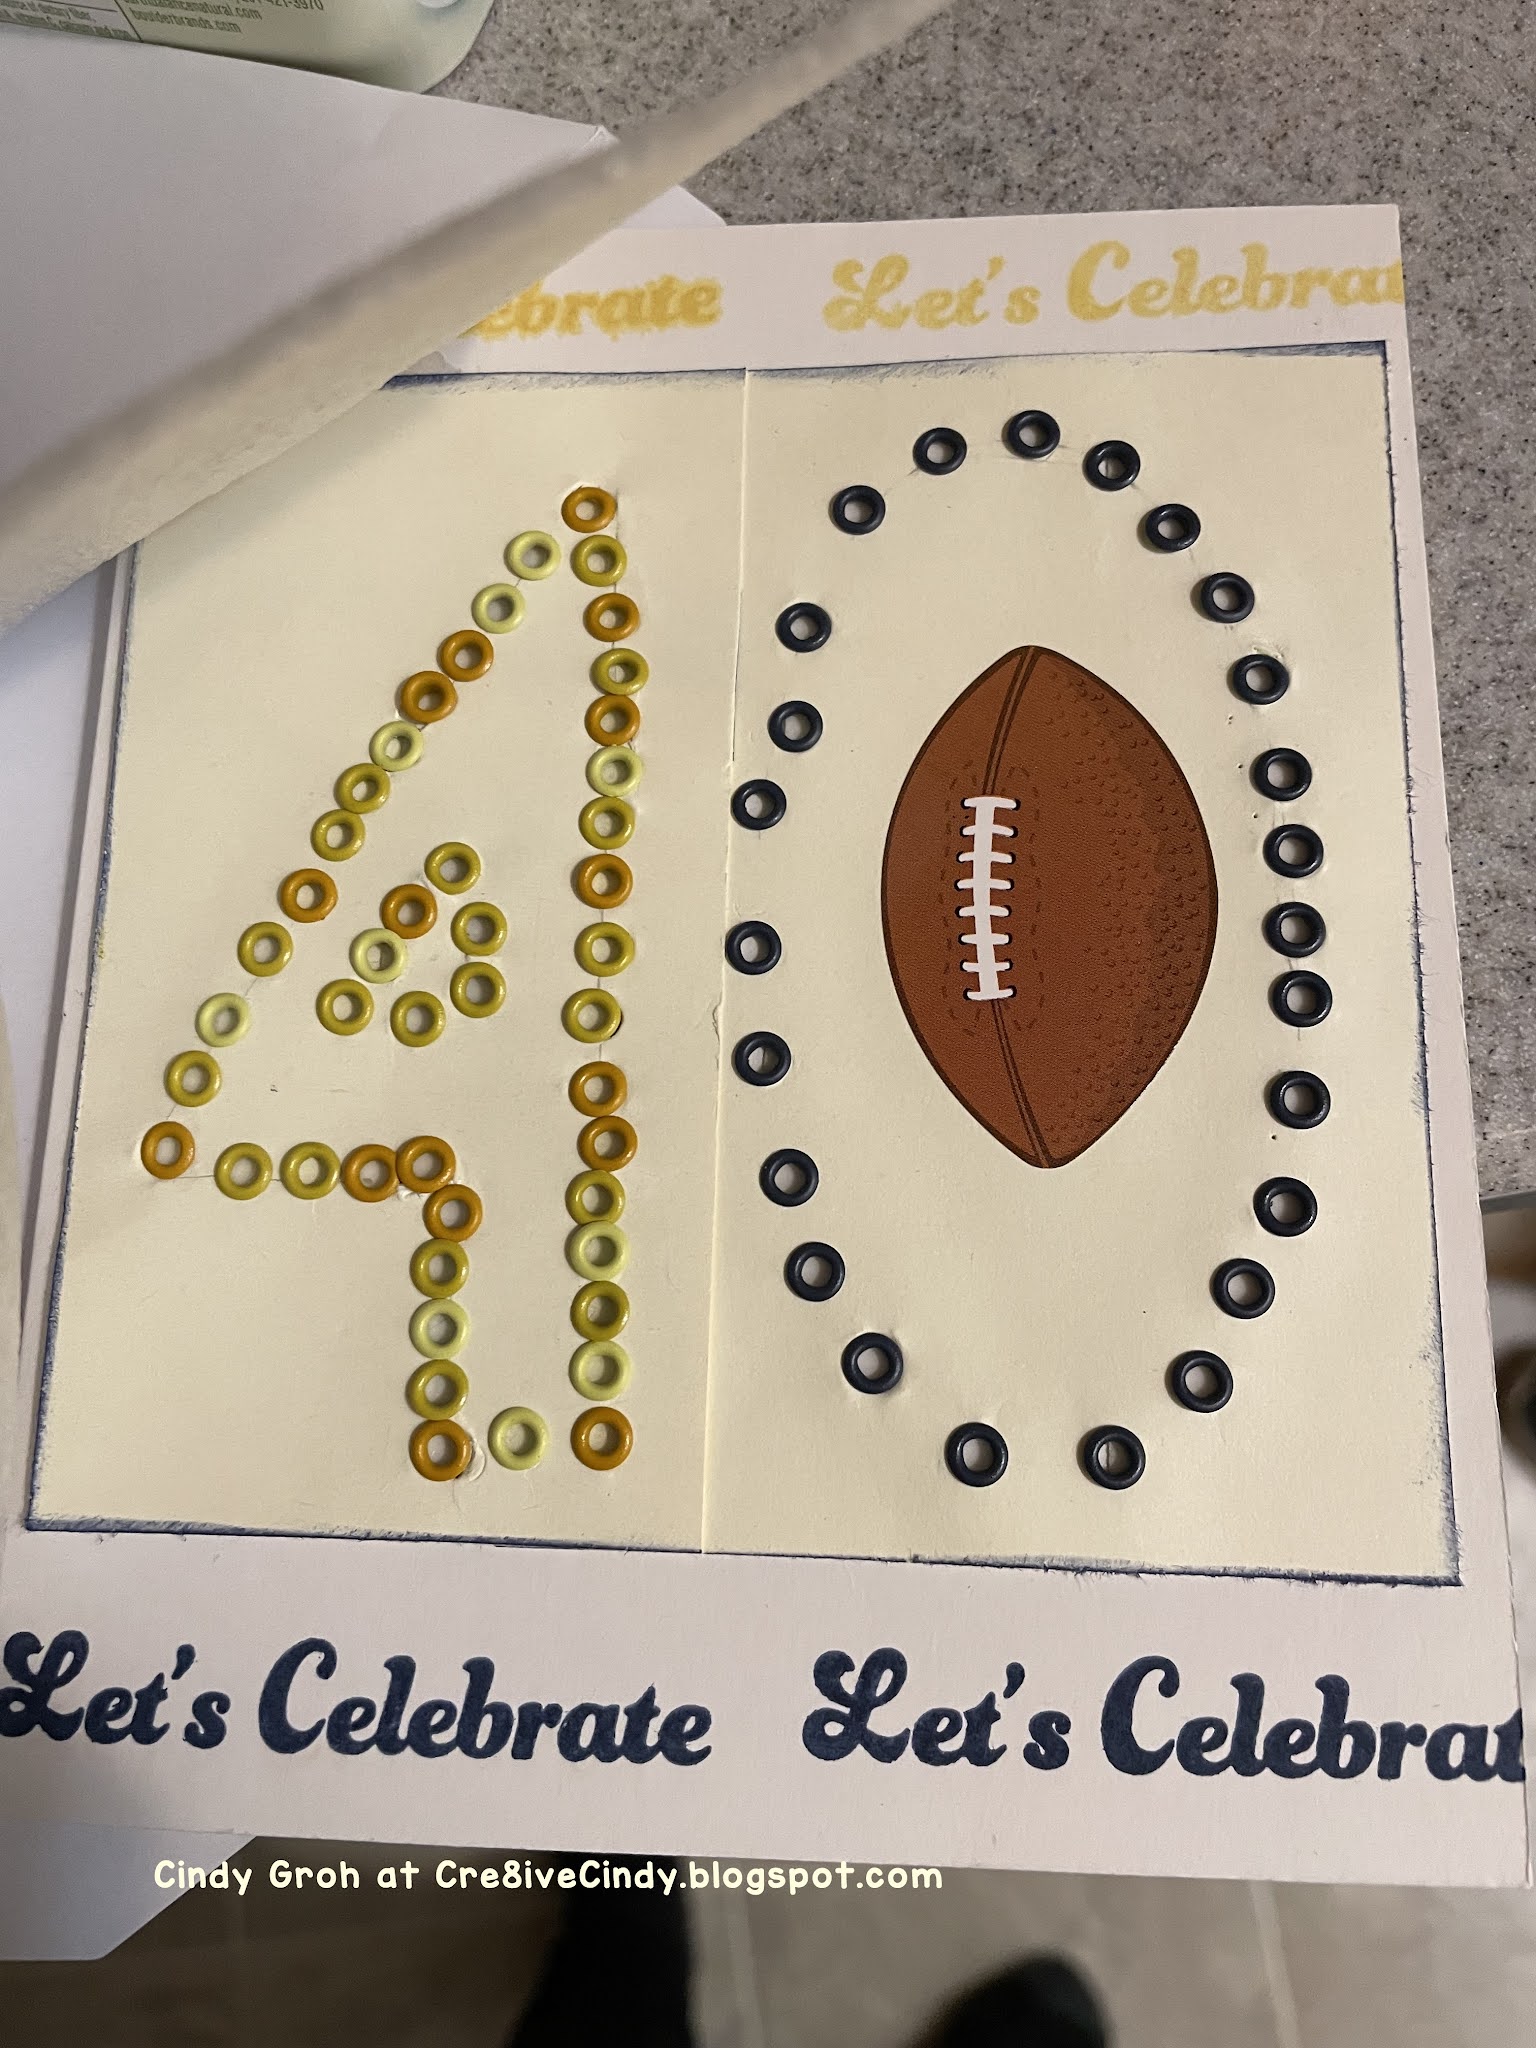
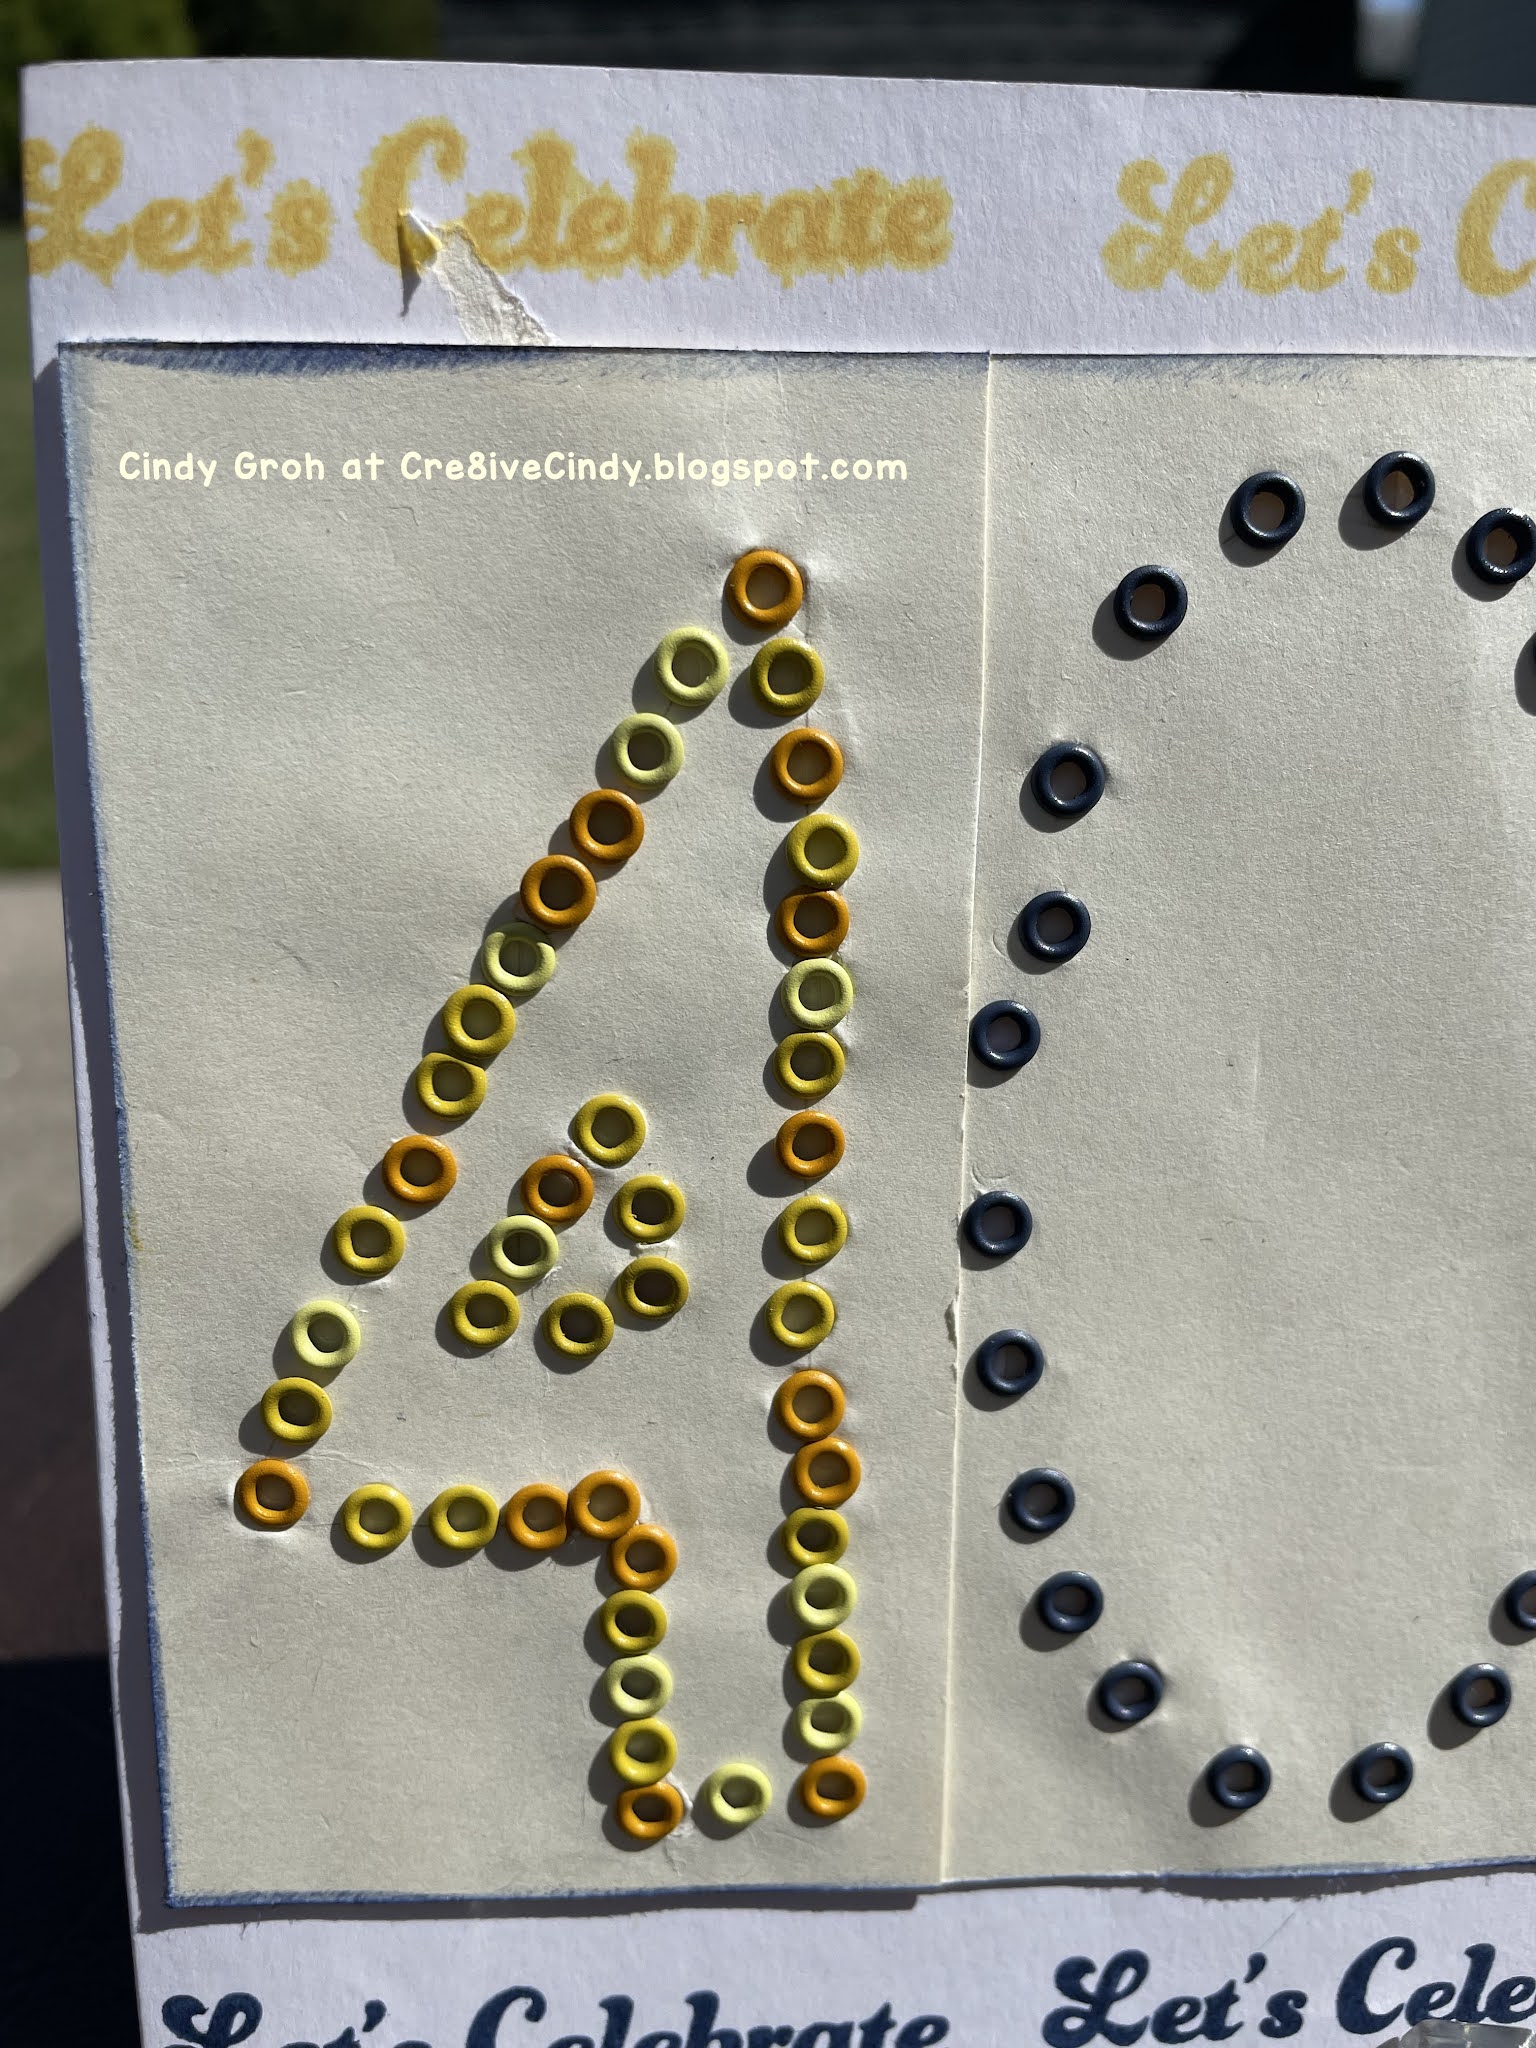
The concept was good the execution was not so good. I really don't want to talk about this card because it took forever and it turned out so juvenile. I can't say I will do it again but can't is a strong word and I do have a few other ideas I want to try using my eyelets.
The sentiment stamp is by Paper Smooches. 
The eyelets are from my stash.
I like the next picture with the added
center to the zero.


The paper tore at the VERY LAST minute. I didn't want to try and "fix it" and risk making it worse. UGH! 


Here's the inside sentiment accompanied by a massive amount of 40's sequins.

Thanks for looking

Friday, August 27, 2021

Online Card Class Day 3 Pleating Christmas tree card

Online card Class day 3

The stamps are by MyStamp Box
This was the best of 4 tries at weaving. However, I glued the woven piece on the wrong side of the card.

Thanks for looking

Sunday, August 30, 2020

Blue Square Best Wishes Shaker Card

I donated this card to a special little lady.
I used a Spellbinders to cut out the window 
The rectangle with stamped sentiment is an eBay die
I used a stencil by Gina Marie with distress ink to create the background paper 


I make my own envelopes for the square cards. I rarely send square cards. Therefore, this Christmas envelope was the only one I had available. I was in a hurry to get the card into the mail for a little girl's birthday. 
Note to self , make more square envelopes.


Thanks for looking.

Sunday, August 02, 2020

Have A... IDK Something Shaker Card

This shaker card uses a sentiment stamp by Lawn Fawn 
The die-cut that the sentiment is on is by Spellbinders 
The patterned paper was made using stencils by The Crafters Workshop and another by Tim Holtz 
I sprayed with glimmer mist by tattered angels.


I can use this card for a get well saying:
Have a... 
“Speedy recovery”
“Happy birthday “
“Happy Anniversary”
Those are the only ones I can think of. Any suggestions?

Thanks for looking

Saturday, October 26, 2019

Deep Red Stamps Scary Tree Stamp Cards

I used this scary tree stamp by Deep Red Stamps for 2 different cards

Deep Red Stamps Scary Tree Stamp

I created the background blending distress inks and on a piece of cardstock with an Inkadinkado masking paper as the moon.
I spritzed with water.
I stamped the tree with black ink and colored it in with distress ink and a Fantstick.

**Scroll down because this card gets better.


My second card
I heat embossed the tree with gold embossing powder and colored it in with Copic markers before fussy cutting it out. The background die-cut is by Sizzix. The polka dot paper is the negative of the die-cut.


BUT I thought they were very blah 
So then I added to them:
 Sequin stars are unknown
The sticker letters that are a tree shape are by Prove Craft. They are very old.
The eyes in the OO's are from the dollar store


This one has the same stars and eyes on one of the headstones.
The pumpkin is by Jolee's.
The circle number stickers on the pumpkin are unknown.


Here are few other cards using the scary tree stamp

Thanks for looking

Friday, May 27, 2016

Birthday Shaker card

I love the look of shaker cards and shaking them but they can be time consuming. I need to get a system down for making them - and one for my entire life.

The patterned paper by Studio G and the pink shimmer background paper and black cardstock paper by Recollections. The sentiment by Stamping Scrapping is heat embossed with Versa Mark ink and white embossing powder on a Spellbinder label die. The ribbon is what one might call vintage. It is from my husband's Grandmother stash. It's a shame that so much of it is covered up because it is beautiful. The sequins and beads are from dance costumes and donations people have given me with no packaging.


Thanks for looking.

Wednesday, May 04, 2016

Just for You Shaker Card

For my card today, I die cut the Design Objectives flower out of  SU cardstock, I stamped in red (Stampin Up ink) the Fiskars sentiment stamp on the label die by Clearly Besotted. There is a stamp that matches the die but I find it challenging to get the stamp and the die to match up for a perfect or even semi perfect stamped image that lines up with the die. It's an art form that I haven't mastered yet.

I used 3M dimensional adhesive and transparency film for the shaker by placing the red cardstock paper with the transparency upside down to prepare for the next step. I taped the transparency to the red cardstock, then adding the dimensional adhesive around the flower shape all the way to the edges of each piece of the flower. I poured the sequins and shaker stuff inside the bowl like opening that I made with the dimensional adhesive. I removed the release paper of the dimensional adhesive and adhered a piece of white cardstock to be the background of the shaker. As to close up the "bowl". I adhered dimensional adhesive to the rest of the red panel before adhering it to the polka dot paper (Studio G). Wow, I hope I said that correctly.

The sequins and beads in the shaker are unknown and the gold strips of sequins came off an old dance costume. What else will or can I use 4 totes full of costumers for? Maybe, when my niece gets older and can fit in them, she will be as fond of them as I am.


Thanks for stopping by to take a look.

Wednesday, March 30, 2016

65 Year Old Sequin Card

This card required a lot more work then I usually put into a card. I die cut the 65 using my Cricut and the cartridge CTMH Art Philosophy. The purple cardstock is by Recollections and nn that same colored cardstock, I glued a lot of sequins in rows with Ranger's multi medium matte adhesive. I would adhere a bunch sequins down thinking I was close to being done and upon placing the negative of the 65 paper over the sequins, I was no where near done.

When I did place the negative over the sequins I did notice that the sequins had to extend farther then numbers because I used foam adhesive for the negative and you could see into the card. I thought that made the card look incomplete and therefore I did more rows of sequins to get the look I wanted.

Once the sequins were in place and the adhesive was dry, I added the foam adhesive to the negative 65 and applied multi medium matte adhesive to those foam squares. I placed the negative piece to the sequined paper and placed a heavy object on it to dry.

 I used a lot of foam squares and in retrospect I think I would die cut a regular full piece of foam when I die cut the number. It would save time not having to pull off all those backings of the foam squares and would look better from the side.

The swirl is a Cricut cut but I'm not sure what cartridge however I know that the flower is by Making Memories and the glitter circles by Recollections. I added Glossy Accents by Ranger to the flower.


Thanks for looking.

Sunday, August 09, 2015

6th Anniversary

Hi. I'm feeling very sheepish and kind of stupid because here is what I was going to say:

Today's kind of a special day; I started my blog on this day in 2009. 6 years is a long time to have a blog and post most days of the week. I have been on a bunch of design teams. I've had a handful of backgrounds. I've made some friends out there in blogland. I'm pleased with how things have worked out with my blog.

But upon looking back at my first blog post it says and I quote, 

"So here we go. Today is 8-7 and I have started a blog. Enjoy"

All I can do is laugh out loud. Guess I don't need to get all philosophical since it was two days ago and 6 years that I started my blog. 

So here is the first layout that I published on 8-8-09:


Here is my first card that I published on 8-9-09:


They're not really very impressive or what I'm doing these days but we all have to start somewhere.

Today's layout is a another one for my Christmas card book. I followed a sketch from Sketchabilities (#144). I started with white cardstock and inked a Tim Holtz stencil on the right side with distress ink and an ink blending tool. The patterned paper is by Coredinations and cardstock by Recollections. The tag is a Sizzix die cut and I secured a large black eyelet in the end. TheJ and K are stickers for your house that ended up at my house, who knows how and the W is a rub on by Reminisce. (JWK is what they call her) The border punch is by EK Success and the black snowflake is by Maya Road. The stickers are by K and Co, Jolee's and Sticko which are all part of EK Success. The sequins are by Craft Medley.


So I'm thinking a giveaway is in order. Become a follower of my blog and leave me a comment below. I'll random.org on August 30th. If you have a blog tell me when you started it.

As usual of you share on 
or
follow me on
or

leave another comment here telling me and you'll get another chance at my giveaway.

Stop back by tomorrow for Manly Monday.

Thank you.