Thursday, September 15, 2016

Skating into Christmas

Christmas will be here before we know it so I've started working on them. This one uses the Deep Red Stamps Ice Skates stamp. I stamped it with Memento black ink and colored it in with Copic markers. I fussy cut the skates out best I could and then ran a black marker around the edges. 

I cut the layered die cut the image is on with my Cricut and the Art Philosophy cartridge. The cream cardstock is by Bazzil and the burgundy by The Paper Company. The center paper is by Die Cuts with a View. The sentiment is a gold sticker by Mark Enterprises. They look really old.

The background of my card is an old Christmas card that was given to a friend and she in turn gave to me. I do love to recycle or would it be called upcycle-who knows. I just love to give old things new life.


This picture shows part of the Christmas card that I cut off in order to fit on a 4 x 5 1/2 pre made card base.


Thanks for looking.

Wednesday, September 14, 2016

Halloween Embellishments

I made some embellishments that could be used on a card or a scrapbook layout or whatever. Here's a look at all three and then I talk about them individually below:

The pumpkin is a digital stamp by Hope Jacare that I colored in with Copic Markers. I matted some orange cardstock by Coredinations behind it and added the brad from Around the Block in the left upper corner.


This witch stamp is by Inkadinkado and was stamped with Hero Arts black ink. I punched a circle out of a Post It note and adhered it to the cardstock to act as a mask for my moon. I inked the sky with 3 different blue distress inks with my ink blending tool. The gold you see in the witch's stamp and around the die cut sentiment is a gold gel pen by Creative Memories. The sentiment says wicked! but it didn't photograph well.


The last embellishment is on orange Coredinations cardstock. Every piece in this embellishment has been inked with distress ink. The RIP stamp is by Stampin Up with black Hero Arts ink. The patterned paper in the corner is by K and i Memories. The cat is a vintage "die cut" that I found in my MIL's craft stash. The white piece of paper in the center has been stamped with Deep Red Stamps Burlwood background stamp with Versa Mark ink and heat embossed with orange embossing powder.


Thanks for stopping by.

Tuesday, September 13, 2016

Cork Love ATC's

The theme for these ATC's (Artist Trading Cards) is use cork and this first part has nothing to do with cork but I wanted to show the background process. Hang in there until the fifth picture where you will see the cork.
 I found this very ugly paper in my stash and decided it needed to go.

I adhered the paper to a piece of cereal board and inked the edges with distress ink.

For this ATC, I added gold Perfect Pearls to white paint and painted over the ugly paper. After it dried I applied distress ink over a leaf pattern Dreamweaver Stencils, which is in the next photo all the way to the right.

The middle card was done similar to the one above however I added copper Perfect Pearls instead of the gold. 

The card on the left was done differently. I inked the card heavily with distress ink and adhered the stencil on top. Using the paint mixed with gold, I applied the paint over the stencil to reveal the leaf pattern.

Here's what they looked like in the end and you can hardly see the backgrounds. So anyway, the orange background is mulberry paper and the cork tag is by Little Yellow Bicycle. The green and orange tags were these super bright colors that I tried to tone down with distress ink, stamps and an emery boards for sanding. Two of them have orange hemp wrapped around the bottom by Tim Holtz. The leaf brad is unknown 


Thanks for checking out my blog today.

Monday, September 12, 2016

Manly Monday Vintage Delivery Truck

For Manly Monday I stamped this Deep Red Stamps Vintage Delivery Truck Stamp with off white paint onto brown cardstock. I added some cardstock behind it and some of the patterned papers are by Studio Calico and Prima.


Thanks for looking.

Sunday, September 11, 2016

Halloween ATC's

I made these ATC's (Artist Trading Cards) for a Halloween swap. On each of the ATC's I made a spooky background by adding distress ink onto a Dreamweaver Stencils tree stencil. The patterned papers are all scraps that came from companies like: Imaginisce, Making Memories and K and Co. The orange paper is by C Gull and has been inked by different colored distress inks. The haunted houses, bats and small children by pumpkins are these vintage die cuts by Eureka that I found in my MIL's craft totes. The stamps are by Stampin Up-a bat stamp and the sentiment stamp with black ink by Hero Arts.


I used a Prickley Pear Zombie stamp and black Hero Arts ink on this set of ATC's. On two of them I die cut a headstone border for the background. The lantern stamp is by Inkadinkado.


Thanks for looking.

Saturday, September 10, 2016

You're Adorable

This boy embellishment came together with a layered onsie die cut cut out with my Cricut and the Cricut Craft Room Basics. The green paper is by Recollections from one of those 8 1/2 x 11 pastel paper packs. Love when those packs are on sale 4 for $10.00. Then I don't feel "bad" using it, as silly as it sounds because don't you buy paper to use it? lol

The sentiment is a stamp N cut set by Sizzix using Hero Arts blue ink. The background is a Cricut cut  and I distressed the heck out of it with blue and green distress ink and an ink blending tool, both by Ranger's. 


Have a great weekend.

Tuesday, September 06, 2016

Flower Embellishments

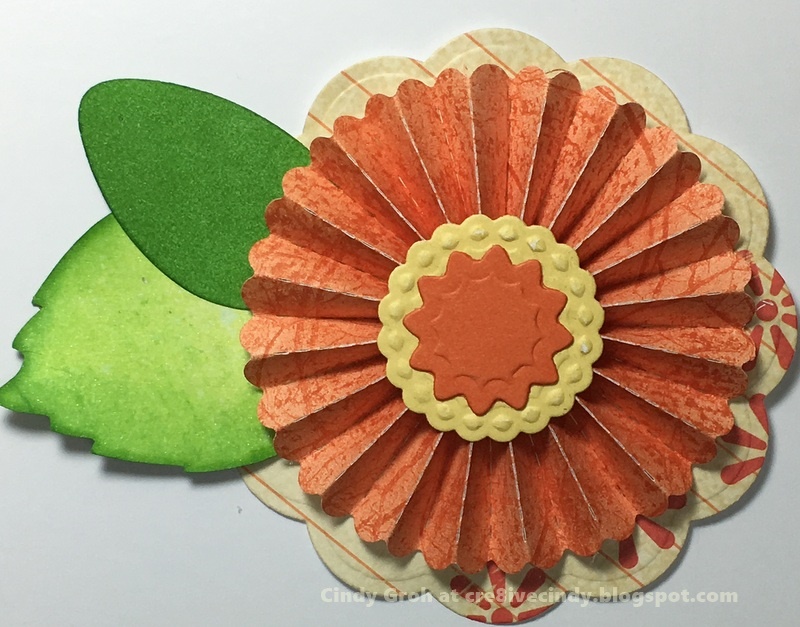
Here are some rosette embellishments. I used the Tim Holtz rosette die with different patterned papers. The striped paper by Doodlebug Designs and second row patterned paper is by K and Co. For the circles and scalloped circle dies (Spellbinders) behind the rosettes I used a mix of patterned papers by Making Memories and cardstock by Recollections. The centers of the rosettes are a mix of Spellbinders dies. You know the ones that are super small and you have now idea what to do with them. I layered them for the center. The leaves are Sizzix die cuts that I inked with green distress ink, Mowed Lawn.


Sunday, September 04, 2016

Many Thank You Cards

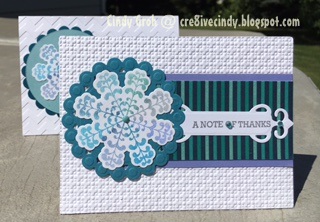
I made these cards for a swap. The flower like stamp is a stamp and die cut set by Sizzix. I used different Colorbox pigment ink cat eyes shape on the stamp to give it some added interest. After stamping them I waited over night before die cutting the flower out with the Cuttlebug. The flower is adhered to a couple of random die cuts that were already cut out and ready to go. Most die cuts are by Spellbinders with some circles cut from the Cricut. 

The rest of the card includes: embossing folders by Stampin Up, sentiment stamps for these first two cards by American Crafts and the others by Hero Arts, charcoal ink by Hero Arts, patterned paper by Die Cuts with a View, purple cardstock by Recollections and some random rhinestones and brads.


Thanks for stopping by.

Saturday, September 03, 2016

Fun Tag

I'm involved in an embellishment swap and we were asked to make tags. I stamped the tag with a canvas stamp by SU with Versa Mark and then heat embossed with white embossing powder. I inked the tag with blue and pink distress ink. I added a flower die cut by SEI on the right and then a sentiment by K and Co. The blue circle is a punch that I stamped with a flourish stamp in brown. to finish I added some blue rhinestones.


Thursday, September 01, 2016

View from a Bird's Nest


I created these ATC's (Artist Trading Cards) with many ideas that in the end turned out quite well but it took a long time to get those ideas together and all to work in a way that I would be proud to trade them.

I started with this Spellbinders die cut but cut in half and then die cut two for each ATC foam with adhesive backs by Tiny Crafts. This will be the bird's nest and the foam will make it so the bird appear to be sitting in the nest.


I had some raffia and I separated each piece to make the strands thinner.


After that, I cut them into smaller pieces.


 I covered the die cut with liquid glue by Beacon and added raffia to the soon to be nest. I would put something heavy on it to dry and move on to the next one. By the time I I was done adding to the 6th nest (just in case something goes wrong, it's good to have extras) the glue was dry on the first so I could Add more glue and add more raffia. This picture shows the start of the layer process.


Moving on to the next step, I inked a hexagon stencil by The Crafter's Workshop with Scattered Straw distress ink and over that inked a polka dot stencil by Heidi Swapp with Tea Dye distress ink. I cut that piece down and matted a scrap of Bazzill cardstock behind it.


I adhered the nests onto two foam die cut before adding them to the background. The chipboard birds are by Prima and to finish the card I stamped the sentiment from Newton's Nook.


I hope you like them. Have a great day.