Showing posts with label corner punches. Show all posts

Monday, May 15, 2023

Manly Monday graduation cards

Details/Products: The stars tape is by Scotch, the black cardstock from Scrapbook Made Simple, and the cap and diploma are puffy stickers by Paper House Productions. The sentiment is cut out with my Cricut and adhered to vellum. I adhered the vellum to a blue cardstock, which made the vellum look blue. I popped up the sentiment with white foam squares. The two corners were rounded with a CM corner rounder.

Details on my second card: Dry embossing folder by Darice. I inked it with distress ink. I adhered the sentiment to colored vellum that didn't match the school colors. So I colored the back of the vellum with a blue Copic marker before running it through my sticker maker by Xyron. The graduation cap is a sticker by Jolee's Boutique by EK Success. Thanks for looking.

Tuesday, April 04, 2023

2 Different Purple Cross Cards

Purple cross card

For the card above, I used scraps of purple paper to create the background. I couldn’t get them on straight, so I purposely made them crooked. The cross is a stencil with iridescent embossing paste and they are both by Dreamweaver stencils. I had to cut behind the cross in order to feed the ribbon to lay over the cross. Then I attached the ribbon on the front with a glue dot.
 q    

For the second card, I stamped the Stampin Up cross stamp and colored it in with Copic Markers. I Outlined the cross with an STA Metallic Pen. The cross is layered on top of Cricut cuts from the cartridge Labels. The corner punch is by Marvy. The flower in the corner is unknown at this time but the leaves die cut is Recollections. Thanks for looking.

Tuesday, October 11, 2022

Deep Red Stamps Sunflowerin the Meadow card

Deep Red Stamps sunflower stamp. I colored with Copic markers. The corners are the kind you slip the paper in front of the corners. The punch is by EK Success. Thanks for looking. 

Thursday, April 07, 2022

It's Time for a Birthday for a Lady Card

I have a happy birthday card on the inside it says “Time for another birthday”. I cut out the pink frame with my Cricut. I put black behind it to give it a base. The die cut was too big for the card front. I had to cut it down until the die cut fit the Preston-made  card base. The clock die cut is by The Girl’s Paperie. The letter stamps are by the Close to my Heart. The heart die cut was on the floor and and the white fit well in between the two words. I just noticed that I used a corner rounder by Creative Memories on the card base.  I found some examples on my blog that use a clock and are referring to birthday.  have to do with time This card uses die cuts from the same ephemera pack  Girly card with a die cut from the same ephemera pack . Other similar cards for a guy are in the 3 different links below. 

Deep Red StampsTag card   Masculine Pocket watch cards, similar concept 

Thanks for looking.

I’m entering the happy birthday challenge at Simon Says Stamp.

Sunday, February 13, 2022

Wild Colored Coffee Cups for a birthday card

The stamp set is from Darice. I colored it with Copic markers. The patterned paper is by DCWV. The EK Success corner punch is one of those things that, "I wonder if this will work". Sort of. The green background is dry embossed with a Cuttlebug folder. Thanks for Looking.

Saturday, January 15, 2022

Grandma LaFrate's 65th Birthday party Scrapbook Layout-

The left page is a pocket sewn onto Creative Memories patterned paper and blue cardstock.
The front of the pull-out page protector is a reprint of the same picture in the front. I reprinted the photo after I annotated everybody's name on their body.
On the backside of the annotated photo is where I used a VERY old title and made a small family tree.
Some other things on the layout:
The Fastener on the left.
Red and blue swirly stickers by CM
Cricut cut-out of a large blue star out of Colorbok patterned paper.
The stamped border (blue lines) at the bottom is a Stampin Up wheel.
At the very bottom is a CM border that was pointy. I took a corner rounder to each point.
The Cricut font is Beef Cakes (lol)

On the right side, I used the same Coredinations cardstock. The patterned paper is by Colorbok. Same border s and star as the other side.
For some reason, I cut the title out of off-white color and I disliked it. So I colored on the tops of every letter with a Copic marker to match the blue on the left. I have a Cricut drawer and I have a baggy of these red diamonds. I was so happy to find them and be able to use one on my layout.


These layouts have been on my table for a while. I finally just sat down and did them. The next layout will be of Paul's mother. That is the last page of that book and the project. The lack of interest to go through a book that I just proudly finished has hurt my feelings. I don't think they don't want to look at what I've done, I think it's those memories of what the home life was like. I'm not sure what to say so I don't push it and I don't have hurt feelings that I once had...before things were revealed to me. Thanks for looking.

Thursday, December 02, 2021

Chalk zig zag border card

This card was a bit frustrating to make. As my husband would say, this card is kicking your butt...and why, well

The Spellbinders zigzag borders are covered with powdered chalk mixed with paint.
The borders are leftovers from this card:
The sentiment stamp is one that I bought off of eBay.
I used different colored distress inks to give it a multi-color appearance. Then I hand cut the sentiment out and inked the edges with distress ink. 


So here was my drama with this card:
I lacked planning the card before I put it together. When I put glue adhesive on the entire zigzag border, the glue stayed on the card base and was tacky. I could not remove the border from the card because it started to come apart. So when I decided to do this frame, the adhesive was/is on the card where those zigzag die-cuts were going to be. WTH did I just say? 

The adhesive is everywhere and I can’t get it off with an adhesive remover square thingy. The corner pieces are so small that when I rubbed over them with the square adhesive remover the corners came off.
The adhesive got on the edges of the card where I originally placed the border. But now that I’m thinking of it and writing this, I could just cut the frame off this card base end it here it to another one, and then cut those corners out to adhere to another card base as well. I might just do that. 

Thanks for looking

Tuesday, November 16, 2021

Purple Lawn Fawn Coffee Card

This Lawn Fawn coffee stamp set is so cute. The patterned paper is by Fancy Pants.
Die-cuts: Spellbinders and the flower is by K and Co called Life's Little Occasions.
The middle layer is a pearlized paper from Recollections and the corners were punched with a corner punch by  Family Treasures.
The coffee cup and steam with matching dies are by Lawn Fawn.


These are other cards I made with this stamp set.
Thanks for looking.

Sunday, June 06, 2021

Paper Smooches Snowman Card


Remember when I said I wasn't going to be so chatty on my blog...hmm. The problem is I just get to "talking" to people that love what I love and then I have a hard time stopping. 
I'm trying to get cards/layouts/projects out of drafts, which sounds easy but...I'm not 100% sure that they weren't blogged about. I really don't want to have something posted twice on my blog so I take the time to do a little searching.

Anyway, 

The stamp is by Paper Smooches and I heat embossed it in black and colored it in with powdered chalk mixed with paint.

The sentiment in the left lower corner is a rub-on with included rhinestones from K and Co.

The die-cuts are by Spellbinders. I inked the inside of the white rectangle die-cut before removing the paper from the die.
Corner die-cuts might be a punch (?).

The green glitter polka dot patterned paper is by Doodlebug. 
The background paper is originally white with clear heat embossed snowflakes all around it. I thought it better to ink that paper with blue distress ink to bring the snowflakes to life.


>My guess is I made the 2 snowmen images at the same time but did not put them together onto a card at the same time.
I think the similar way the image was heat embossed and colored in with chalk, then die-cutting with the inking inside the rectangle leads me to believe that. 


Thanks for looking

Tuesday, May 25, 2021

Colorful and a bit obnoxious butterfly card

This card was donated to someone turning 40. So altogether the sentiment reads, “Sparkle and Shine, Say goodbye to 39.”
The butterfly stamps with matching dies are by Recollections
The embossed background is by Cuttlebug
The corner die-cuts are by Sizzix and the sentiment sticker is by Crate Paper

Thanks for looking

Wednesday, May 19, 2021

Deep Red stamps landscape card


Today my card has a before and after.
But first,
The stamp is by Deep Red Stamps 
and is called
I colored it in with Copic markers 


The oval-ish die-cut is by Spellbinders.
I inked the patterned paper while it was still inside of the die.

The patterned paper is by K and Co.

I felt as though this card was lacking in some way. I didn’t include a sentiment so that I could use this card for any occasion.

So, this is the original card and if you scroll down you’ll see I’ve added some corner dies. It gave the card just that little thing that it needed.


The corner die-cuts are by Sizzix.
The problem with these two pictures is the lighting portrays the cards having colors of different contrasts. It is what it is.


Thanks for looking

Saturday, April 17, 2021

Cinderella’s Make a Wish Card


Every little girl wants to be a “princess”.
 I would ask Kate Middleton what it’s like to be one. 
I don’t think it’s what little girls think it is.
But I could be wrong. 

Anyway,

The Cinderella stamp is by Inkadinkado
I colored her in with Copic markers 

After I cut the image down to a square, I used a corner rounder by Creative Memories to round the corners.

The sentiment is an epoxy sticker from my baby boy folder. 

The label die-cut and matching stamp is by Clearly Besotted 

The embossing folder is by Sizzix 

The yellow vellum is from my stash.


Thanks for looking

Sunday, February 07, 2021

Mimi 1st Communion 2 page layout

I have a 2-page layout for today. This is my MIL in her younger years.


All of the labelings are done with alphabet stamps by Lawn Fawn 

The die-cuts on the 1st page are by:
Letters by Quickutz 
Numbers by The Girls Paperie 
Corner punch by Marvy 

The patterned paper is vellum by K and Co.
Flowers and brads from my stash


2nd page:
The dry embossed frame is by Provo Craft (Omgoodness! That thing is so old. Happy to use old stash)

The doilies are by Doodlebug, Stampin Up, and Little Yellow Bicycle.
And then the sentiment at the bottom was a recycled bookmark. 

Doily paper by Basic Grey 


Thanks for looking

Saturday, January 16, 2021

Write on your heart Card


I used a stamp from a friend's stash.
I colored the rubber part in with different colors of distress markers and then huffed on the stamp before stamping it onto white cardstock

The sentiment is vellum and it is by Creative Memories

The corners are rounded with a Marvy punch

The patterned paper behind the green cardstock is a wood grain pattern. I believe it is by Prima.


Thanks for looking


Wednesday, December 23, 2020

10 Christmas Ornament Cards

I used the ornament stamp in all of these cards.

 The stamp I used is by Paper Salon.  
I colored the bulbs in with Copic markers

Cards #1 and #2 
The sentiment stamp by Hero Arts and the sticker by Echo Park
The die-cuts are by Spellbinders, except there is one red rectangle that I bought off eBay.
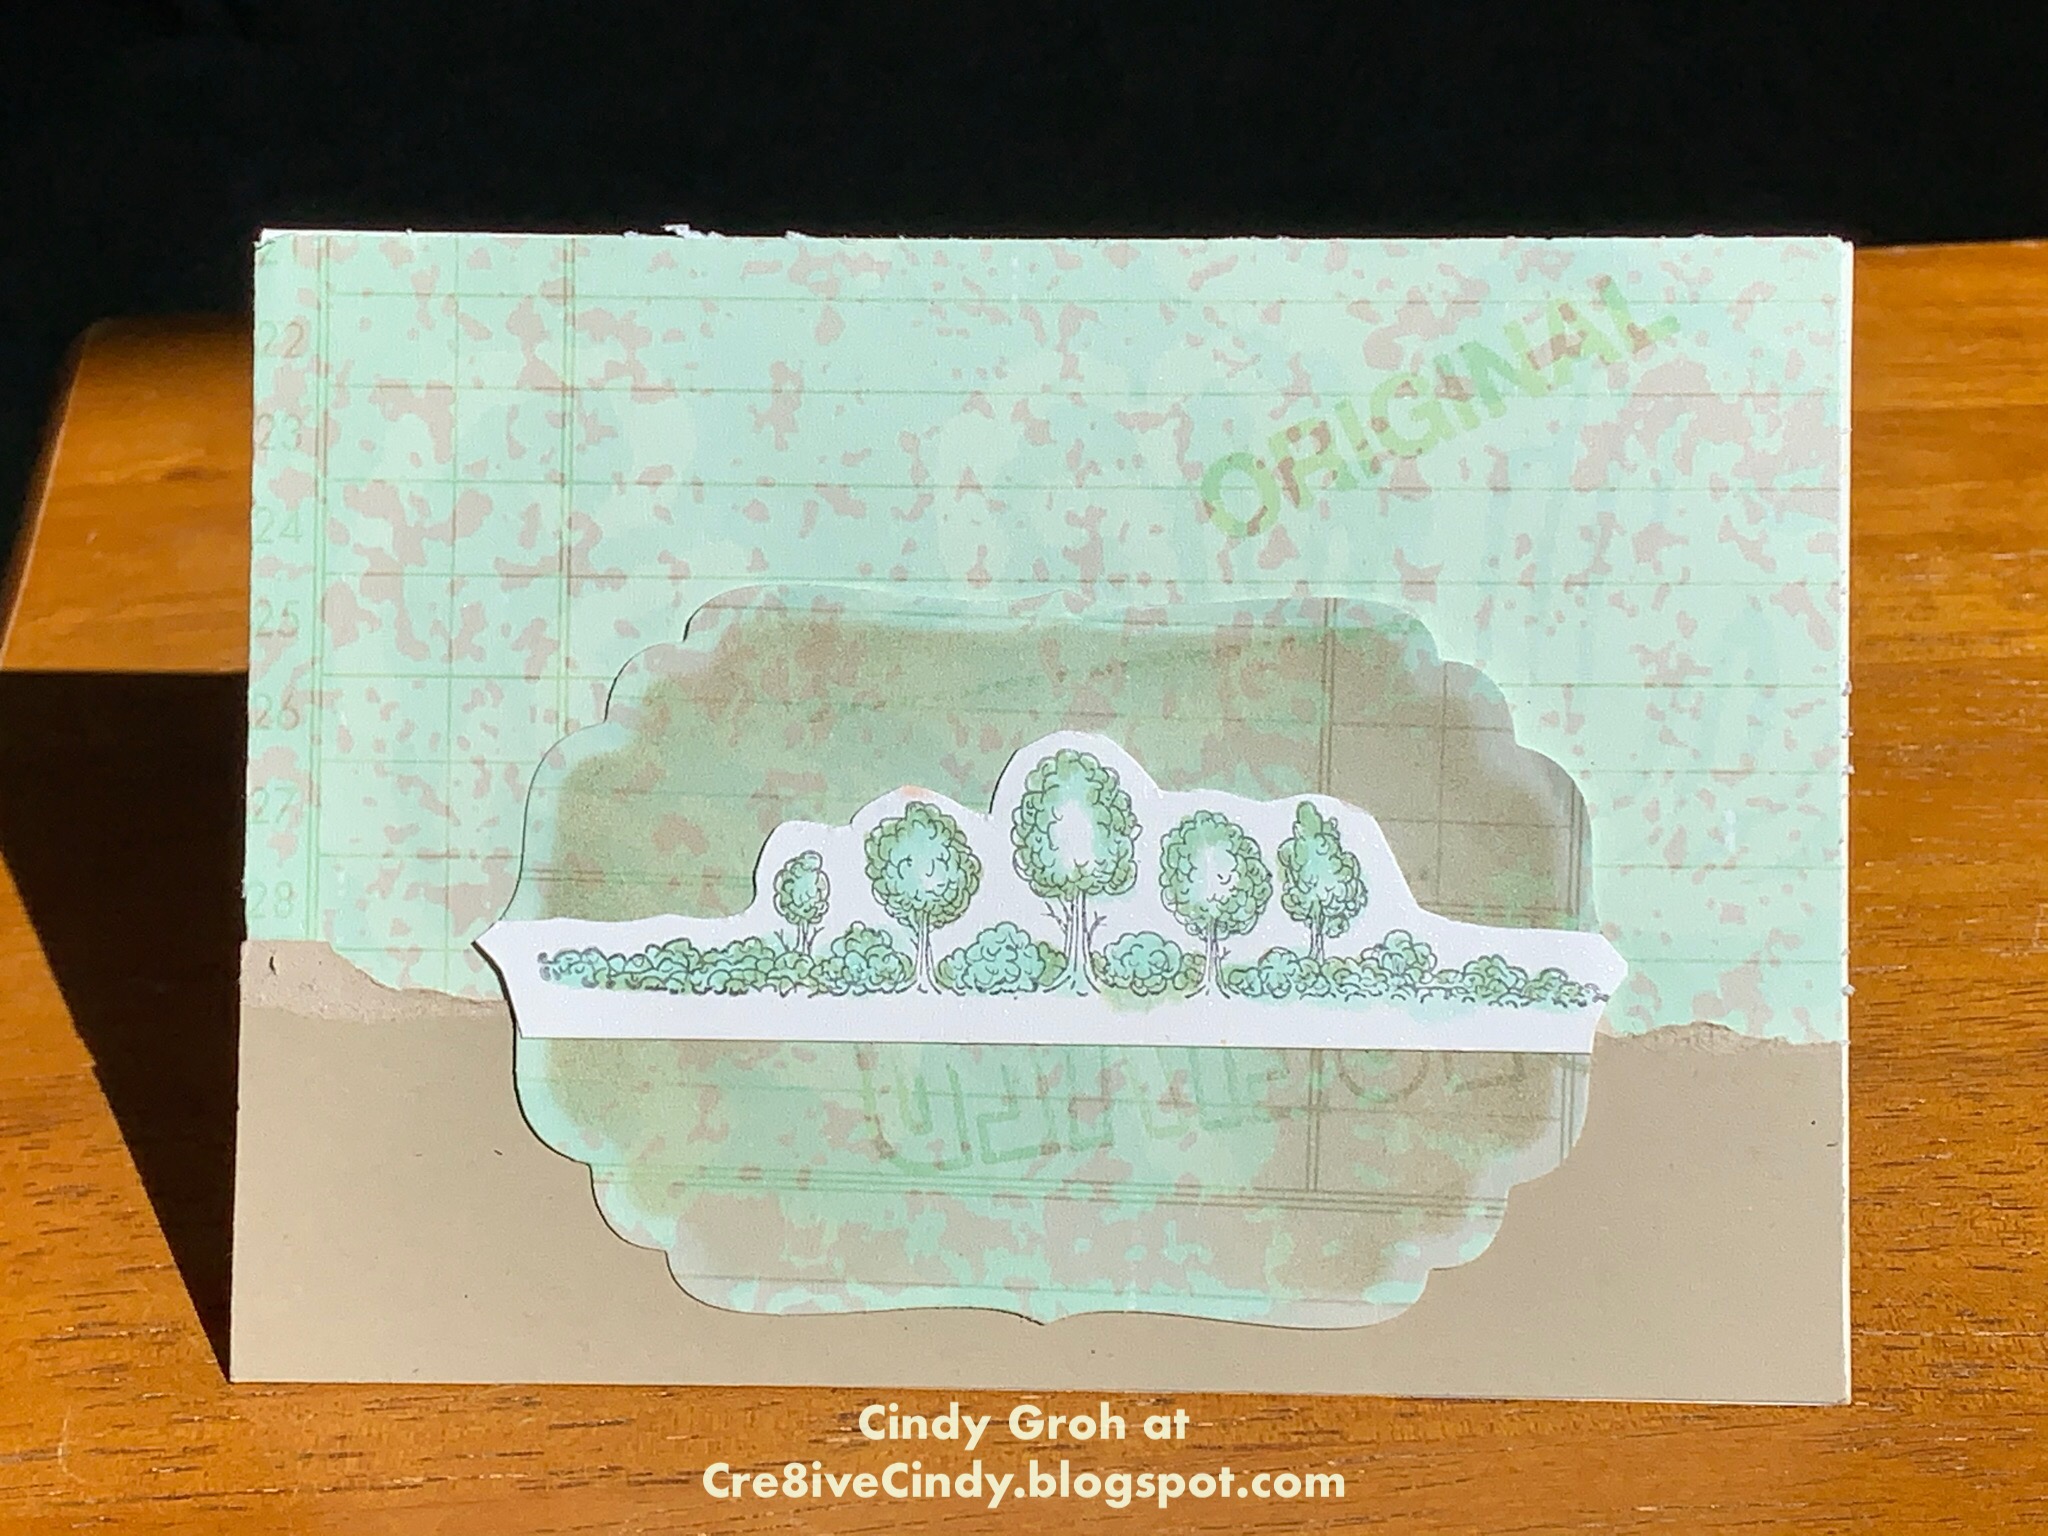
The die-cuts that have lighter green patterned paper are actually product packaging that had a great color and soft pattern. Check out the photo below.  The die-cut is Spellbinder's Label 20.


Card #3
The die-cut Spellbinders And Cricut 
The patterned paper is by Basic Grey 

Card #4
Patterned paper by Die Cuts with a View 
Die cut by Creative Memories 

Card #5
Corner punch by Marvy 
Patterned paper by Making Memories 
Die cut by Spellbinders 

Card #6
The border punch is unknown 
The patterned paper is by October Afternoon 
Epoxy stickers by K and Co.

Card #7
The die-cut Spellbinders And Cricut 
The patterned paper is by Making Memories and I’m not sure.
Sentiment stamp by Hero Arts 

Card #8
The die-cut Spellbinders And Cricut 
The patterned paper is by Stampin Up 
Rickrack from stash 

Card #9
The die-cut Spellbinders And Martha Stewart 
The patterned paper is by My Mind’s Eye 

Card#10
This one will come up again tomorrow
Patterned paper by Die Cuts with a View
Die cuts by Cricut
The sentiment is a sticker by SRM Stickers


There will be one more in tomorrow's post.

Thanks for looking


These last two pictures are the ornament stamps on their die-cut they went to.
On the back of the red paper, the writing tells me what Copic colors I used. Some of them have directions or pressures. Things for me to look back at when the card is finished and learn from it.


Thanks for looking.

Saturday, October 03, 2020

The end of 1974 and the 1975 shows the boys cleaning the kitchen Pocket Pages

This post is the end of 1974 and the second page starts with 1975
I used stamps by Christmas is by Hero Arts
The tree and date die- cuts are by Cricut
The tree sticker is by Jolee's
Green washi tape on the bottom of the first card
The patterned papers are by:
Echo Park, Stampin Up, Me and My Big Ideas, and the green on top says The Divine Collection


I made this card with CM stickers and stamps by Stampin Up and Michael's dollar bin


This next moves us into 1975


Kitchen die-cuts by Cricut
Numbers are stickers
Not sure on the Main dish stamp


Circle button die-cuts by Echo Park with floss


The corner punch is by EK Success
The patterned paper is by Me and My Big Ideas
Vellum by The Paper Studio at Hobby Lobby
I adhered the vellum onto the card with the Xyron sticker maker.
Journal on vellum is using the draw feature on Cricut
The font is called Kickball
Rub-on by Autumn Leaves


Thanks for looking.

Wednesday, July 08, 2020

Pretty Corner Die cuts made into a square

I used an embossing folder by The Paper Studio
The sentiment is by Stamps for Life (maybe)
The scalloped circle die-cut is by Spellbinders and corners by Cuttlebug
The patterned paper is by Pebbles


Thanks for looking
Here are some other cards using the same stamp.
I like the peach one more than this one.

Friday, March 20, 2020

Green Coffee Cup Card

I used sentiment stamps by Lawn Fawn
The die- cuts are by Spellbinders
The patterned paper is from my stash
The coffee cup sticker by Forever in Time
Corner punch at the bottom.
Not my favorite card but live and learn from each card.


Thanks for looking