Monday, May 31, 2021

Memorial Day Thank you Card with Handmade Star Background


Happy Memorial Day!
Thank you to all the former and active servicemen and servicewomen that have fought for our country.
Thank you doesn't seem like enough.
God bless you all.
 
This card was supposed to be today's post but I forgot to change out the layout for this card. Oh well, it's a 2 for 1 day at Cre8iveCindy! 

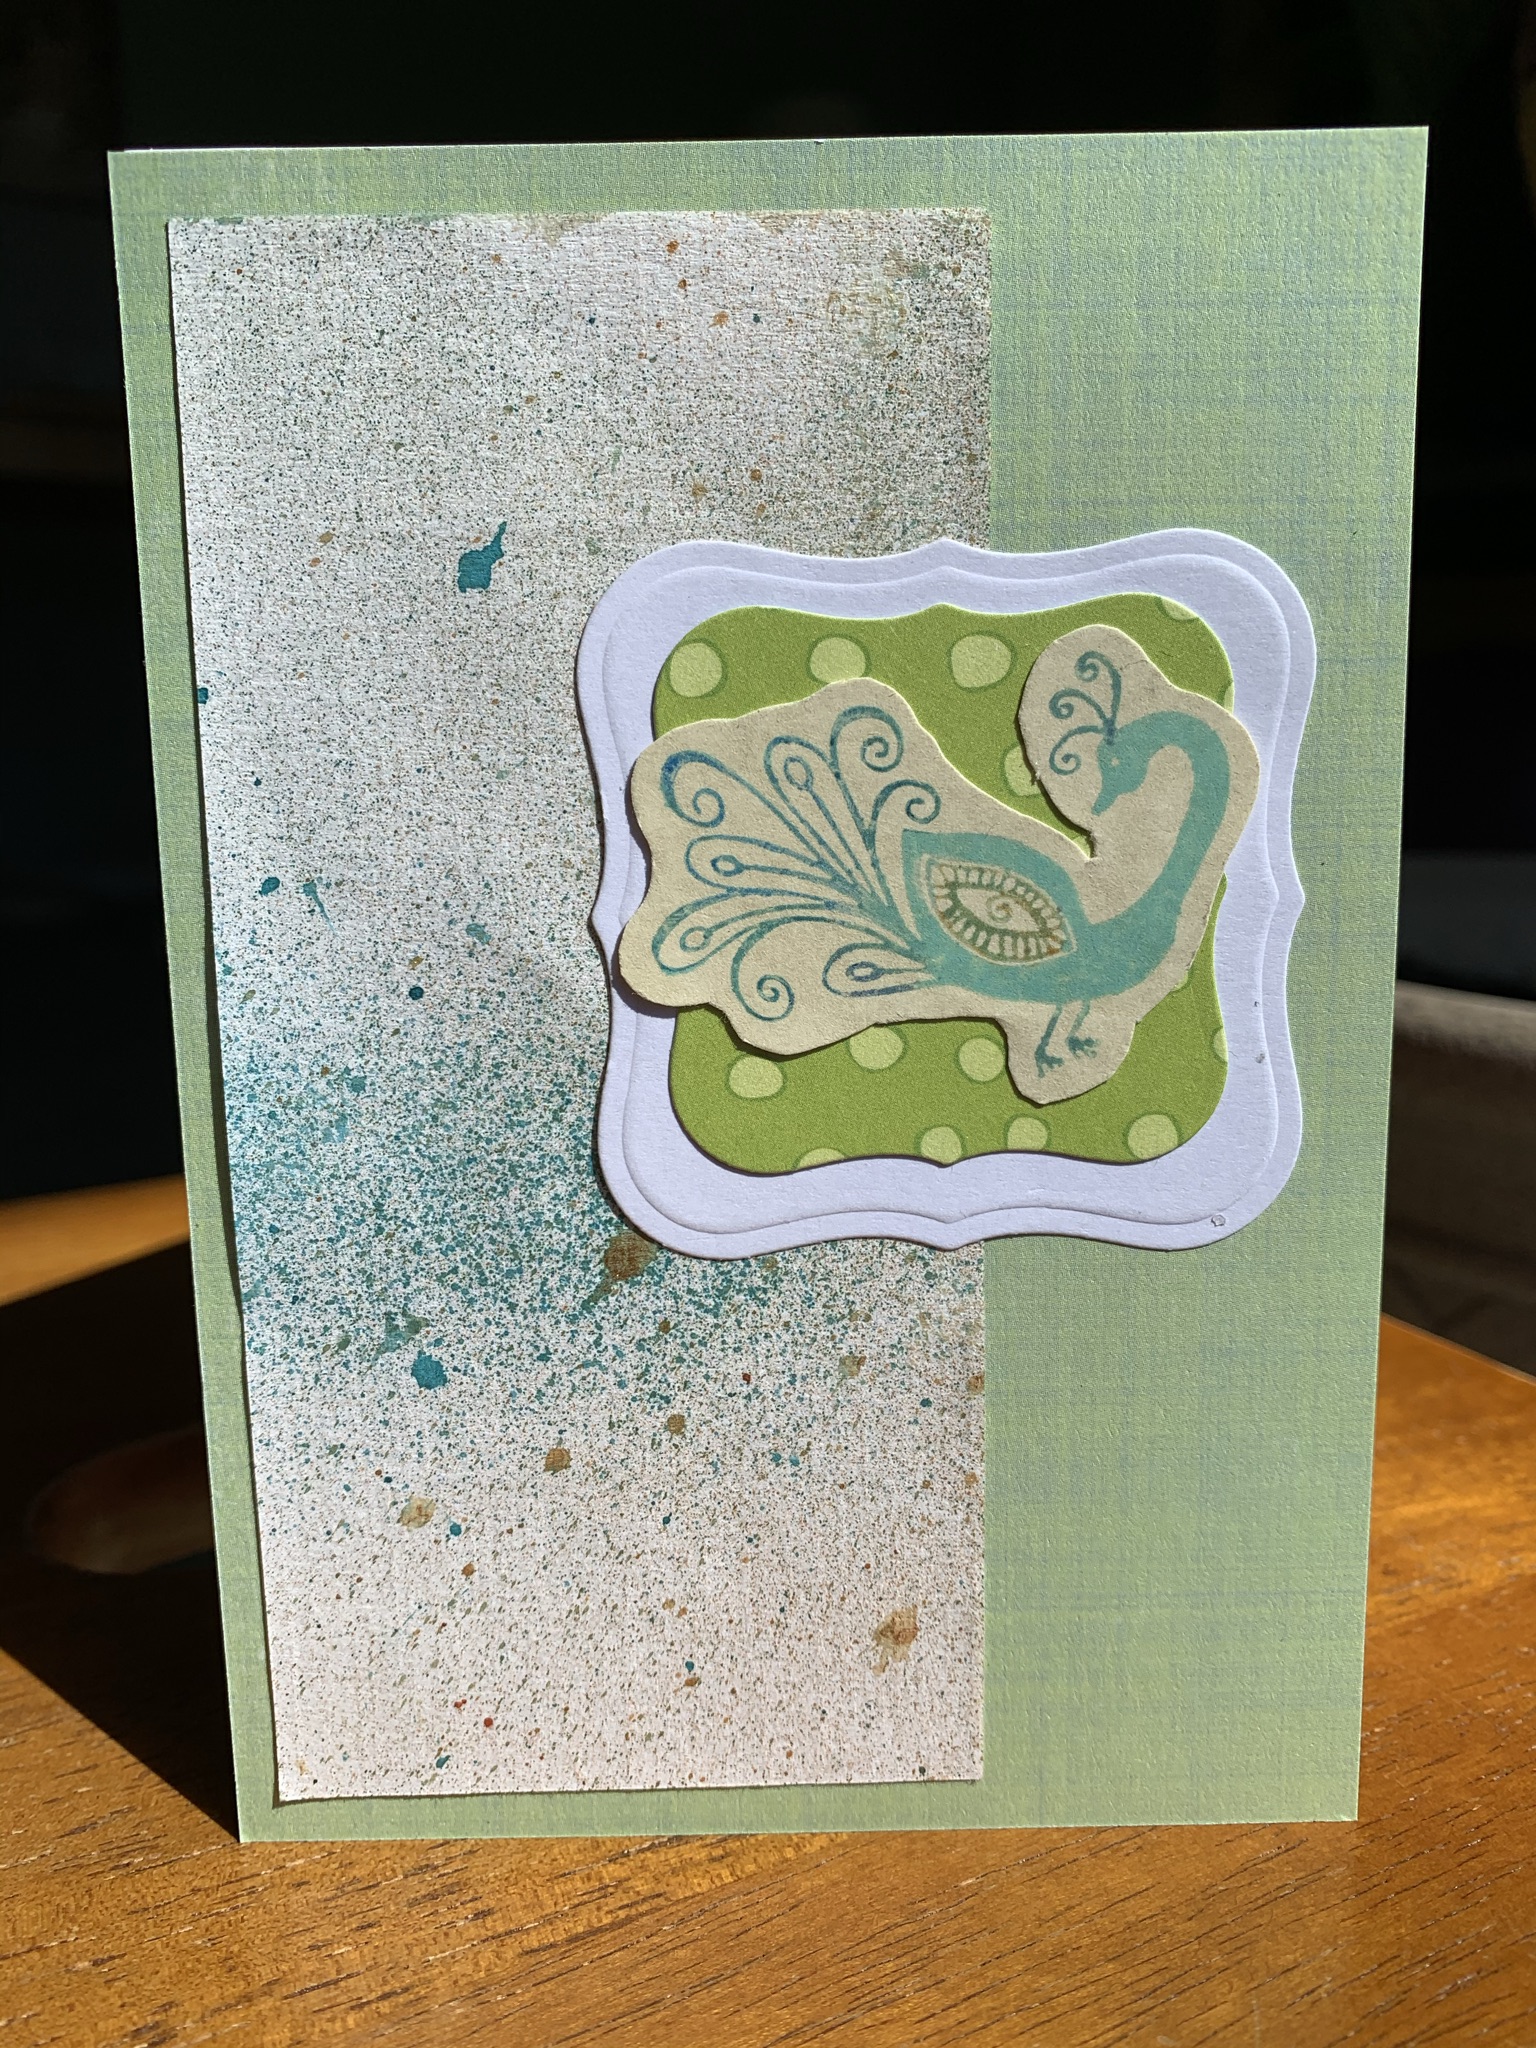
The sentiment is a sticker by Mrs. Grossman's. It's a cute little sheet of thank you sentiments.

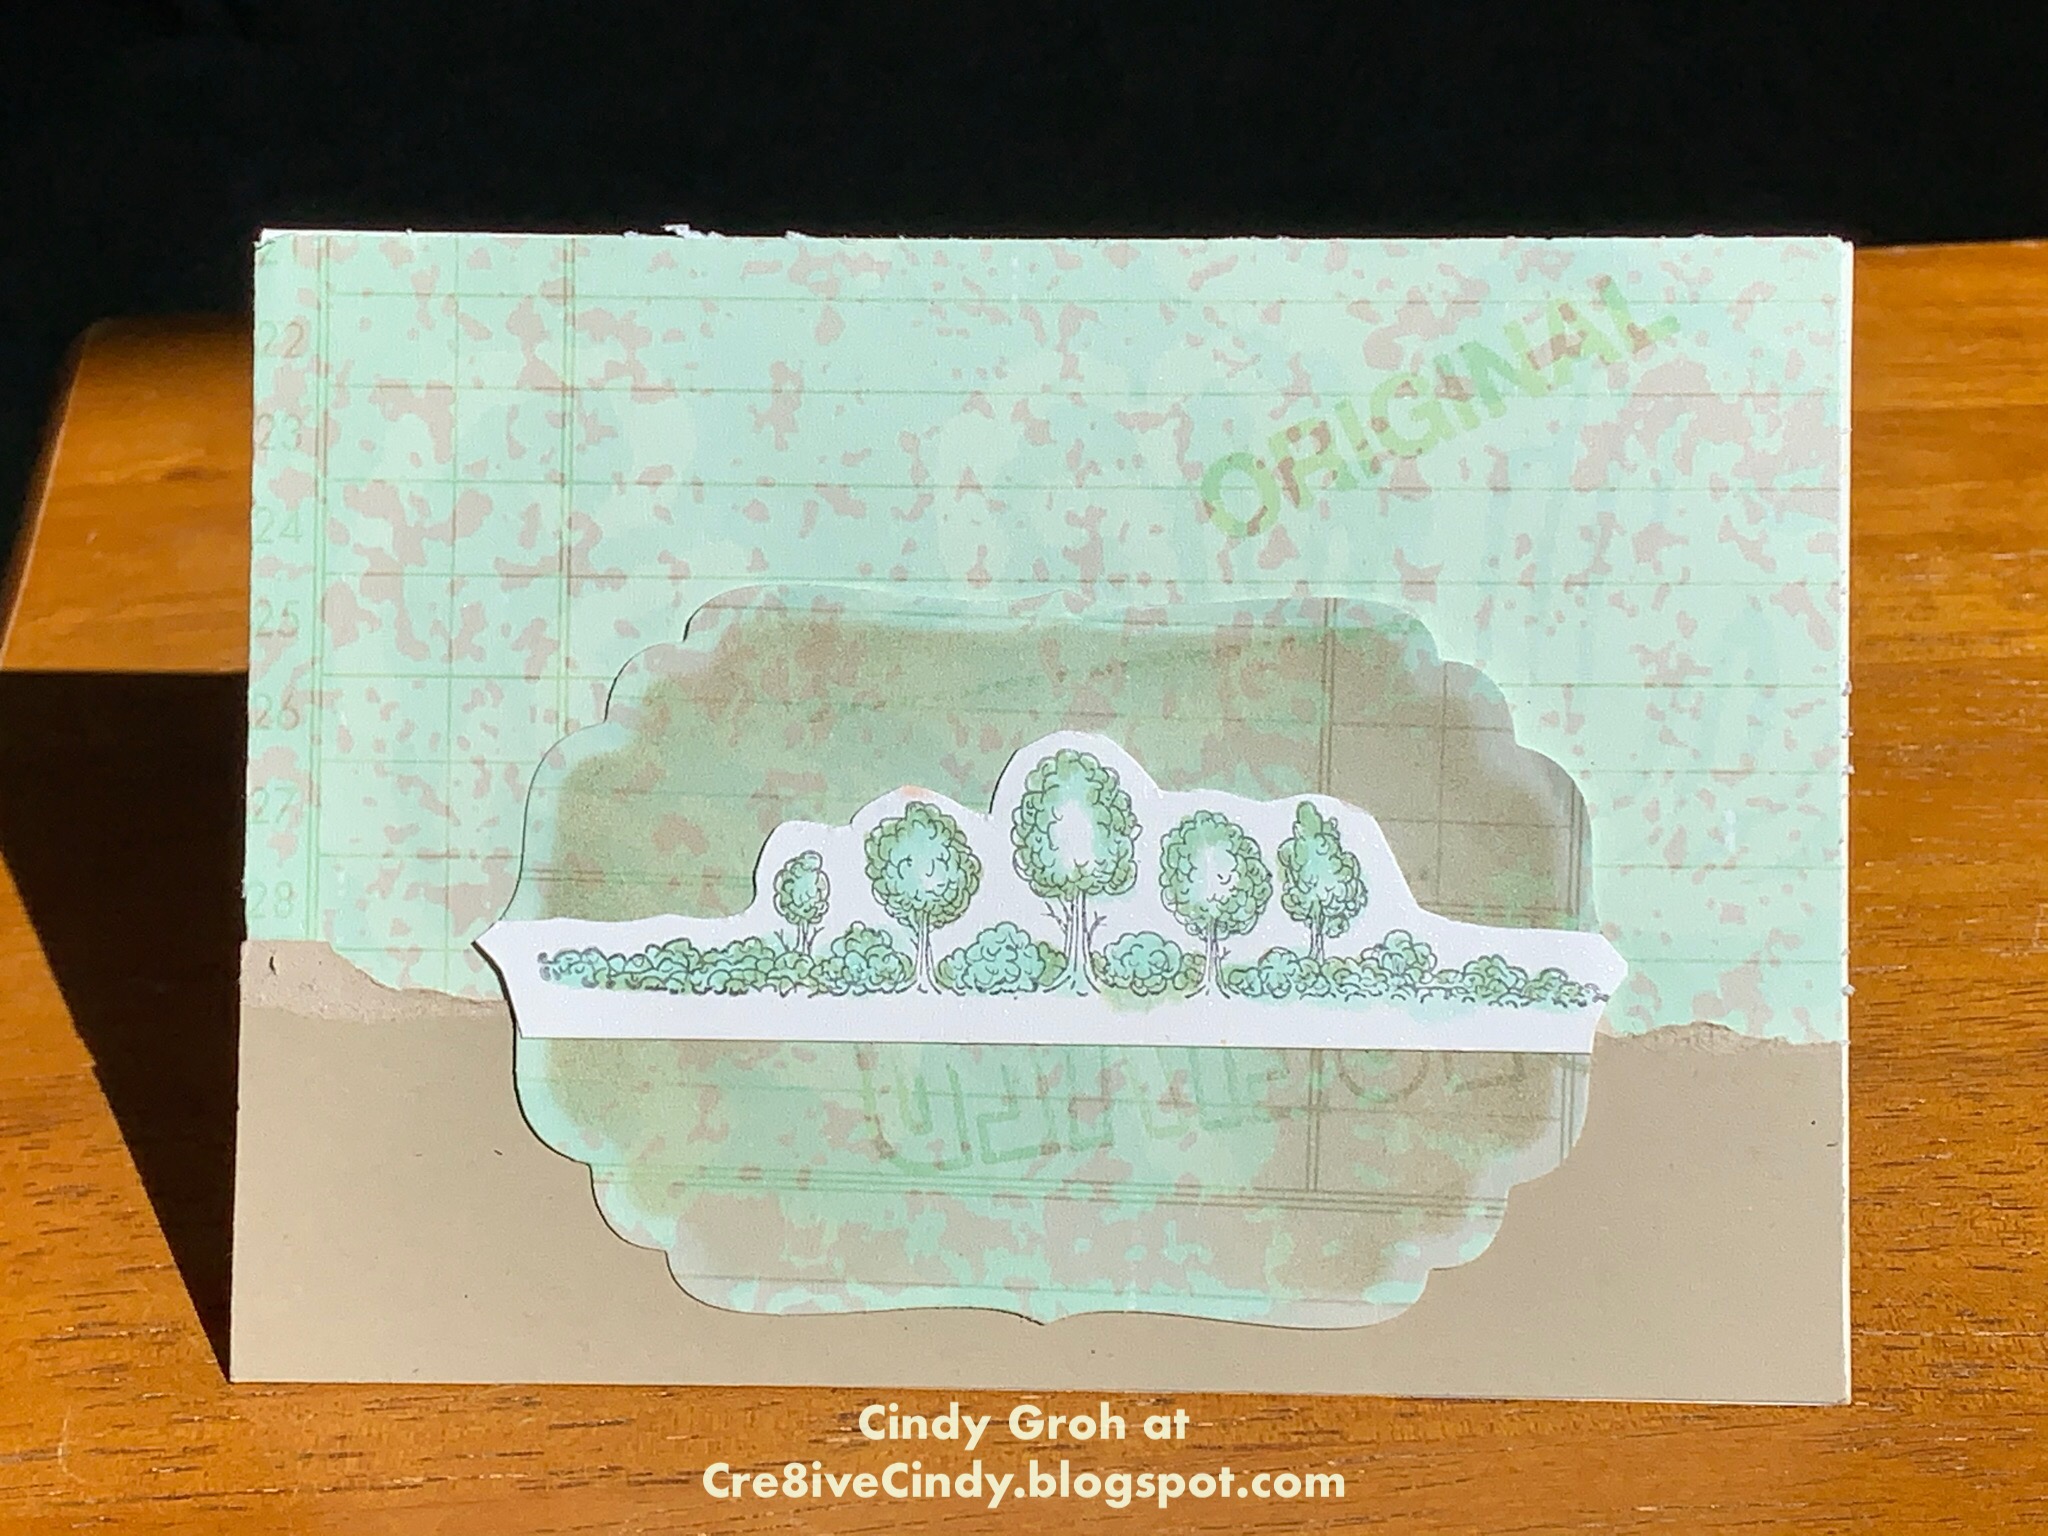
The circle scallop die-cuts are all by Spellbinders. The bottom one is vellum with flicks of color here and there.

The patterned paper is by Me. I punched a bunch (haha) of stars with scrap paper and glued it on the card base. 

The ribbon that goes through the center is from my MIL's stash. It is by The Robert Stanley Collection. I like it and may use it for a 4th of July card.


Thanks for looking

May Calendar layout Celebrate Happy Memorial Day

A calendar layout for Labor Day. The patterned paper is by Die Cuts with a View? Thanks for looking

Sunday, May 30, 2021

Celebrate with Balloons Mini Card for Henry

This is a mini card that I put in with a gift sent to my cousin's son. No stamps. The sentiment is from a 6x6 paper pad. The die-cuts- eBay (blue) and Creative Memories (yellow). The other papers are from my stash. The yellow polka dot down the side is washi tape by Stampin Up.

Thanks for looking

Saturday, May 29, 2021

1st Communion and Easter Scrapbook Layout


Gabe's life continues,
The swirl stamp on the right side of the inked-up cardstock is by Kitchen Sink Stamps. I used a newly inked navy ink.

The die-cuts were cut with my Cricut:
Happy Easter is by Holiday Cakes
Communion and the "st" are the Aphrodite font
The number "1" is the Sugar and Spice font
I can't find the date font.

The patterned paper is unknown


Thanks for looking

Friday, May 28, 2021

Scrapbook Layout of Hubby in 2nd grade

This layout is for my hubby's scrapbook.

I’m not sure of all of the details of these layouts other than:

Crate Papers 

Shaped paper from Michael’s Recollections 

Some stickers on the side are by Little Yellow Bicycle 

The labeling was done with tiny alphabet stamps from Oriental Trading Co. 

There are some Elle’s Studio labels

Patterned paper by K and Co and Stampin Up.

The twine is unknown.

Letter stamps are by Lawn Fawn.

And here the two layouts are side by


Thanks for looking

Thursday, May 27, 2021

3 Rose Heart cards

I have three cards today. I used the same heart stamp in all of these cards and used the same color combo of different distress markers to color on the back of the stamp before I  huffed on it and stamped it onto white cardstock. The lighter-colored hearts are second-generation stamping. If you’re not familiar with the term second-generation stamping, let me explain. Like I said above, I colored the image with distress markers, huffed on the stamp, and stamped it onto a piece of white cardstock. Well instead of just doing the same steps again, I huffed on the rubber of the stamp and stamped it onto a different piece of paper. Because of the special properties of distress ink, the huff from my breath adds water to the ink on the stamp, reactivates the ink allowing it to make another impression. The image is lighter but still looks nice. So for my first card, I felt as though the card just needed something to make it not so blah to me. If you don't know, I was stuck upstairs for a while with limited supplies. My craft room is in the basement so my hubby helped me down the stairs to get supplies making this card a little bit better.

Drum roll, please
Tada! 
I inked the edges of all of the papers and the card base with distress ink.
 I created the background paper with a stencil by Gina Marie and a glimmer mist spray. I stamped the Lawn Fawn word “Sending” in black ink so that it would draw your eyes to it. I added a really old Colorbok oval sentiment sticker below, which completed the sentiment on the front card.
I really like the changes.


My second card has a small supply list except the background patterned paper is by K and Co.
The patterned paper strip at the bottom is by Making Memories.
I used a Fiskars border punch on the MM paper. (You can barely see it) 


For the third card, I used scraps of cardstock and patterned paper Provo Craft. The heart stamps in this card are the first generation stamping and the renovated card was the second generation.


All three together.

Below are links to my other cards with this stamp.

Thanks for looking

Wednesday, May 26, 2021

The happy couple groomsman layout

Family album book layouts.
I used a sticker Happy Couple” by Me and My Big Ideas 
The flowers are by Michael’s and Prima
The letters and swirls die-cuts are by Quickutz

The arrow was cut out using my Cricut
I added the black paper to make it stick out more. 

The patterned paper is by My Mind’s Eye. 

Originally, the price of the paper was 59 cents. That should say the age of this paper but I found that when I flipped the paper over it had a 6 for $1.00 sticker.


This is another layout with my FIL as a groomsman. As of now, I don't have a supply list for this one.


Thanks for looking

Tuesday, May 25, 2021

Colorful and a bit obnoxious butterfly card

This card was donated to someone turning 40. So altogether the sentiment reads, “Sparkle and Shine, Say goodbye to 39.”
The butterfly stamps with matching dies are by Recollections
The embossed background is by Cuttlebug
The corner die-cuts are by Sizzix and the sentiment sticker is by Crate Paper

Thanks for looking

Monday, May 24, 2021

Manly Monday Jaxon heat embossed background card

Here is an old card that I've wanted to post for some time now but at times my photos get lost in my computer files and then magically make themselves present and ready for the show.

I made this card for a student that had a baby to go with the gift.
I white heat embossed the Hero Arts background stamp and then used multiple colors of distress ink and a water brush to make each row and the different color blue. 

The letter stamps are by Gina Marie.
I heat embossed them with blue embossing powder. 


Thanks for looking.

Sunday, May 23, 2021

Sunflower upcycled card


I love sunflowers and I couldn't resist taking apart this store-bought card. Some of the pieces were from the inside of the card.

The sentiment is a piece of vellum that I made in my Cricut using the draw and cut feature. 

The yellow die-cut is by Spellbinders


Thanks for looking


Saturday, May 22, 2021

Cousins Layout with a Banner


When it comes to blogging, I'm putting too much pressure on myself. I have 70+ drafts in my blogger account that I can post but haven't because I haven't completed the written portion where I talk about the project. 
The pictures are there but for most, that's it. Therefore, for the next little while, I will be chatting less in order to post more. I may not even give a supply list. Anyway, this was a calendar layout that I repurposed to make a 2-page layout for my nephew's graduation scrapbook. The title banner has a little bit to it. The pennants were cut out using Cricut, then sprayed with Glimmer Mist by Tattered Angels and inked with distress ink. Finally, the alphabet letter stickers are by Making Memories. The years, the left side is a stickers by SRM and the right side is a die-cut that I welded the white cardstock 2010 together using the font Don Juan and my Cricut. The patterned paper on the left is by Stampin Up and the paper on the right is by Imaginisice. On the left side layout there is a strip of words between the two pictures that is from Imaginisce.
<ClicK> Have you ever thought, why did they call their company Tattered Angels, SRM- what does that stand for, Lawn Fawn, Basic Grey, Cosmo Cricket, Bug-a-Boo stamps, Echo Park, Spellbinders, studio Calico, Sizzix, Bazzill. I could go on. But I won’t. If you think of other company names please leave in the comments OR if you know why or where do these companies come from leave me a comment. I have three examples of company names that I can’t understand. 
Colorbox has closed and Colorbok LLC 
 Thanks for looking

Wednesday, May 19, 2021

Deep Red stamps landscape card


Today my card has a before and after.
But first,
The stamp is by Deep Red Stamps 
and is called
I colored it in with Copic markers 


The oval-ish die-cut is by Spellbinders.
I inked the patterned paper while it was still inside of the die.

The patterned paper is by K and Co.

I felt as though this card was lacking in some way. I didn’t include a sentiment so that I could use this card for any occasion.

So, this is the original card and if you scroll down you’ll see I’ve added some corner dies. It gave the card just that little thing that it needed.


The corner die-cuts are by Sizzix.
The problem with these two pictures is the lighting portrays the cards having colors of different contrasts. It is what it is.


Thanks for looking

Tuesday, May 18, 2021

Triple layered Pink Hello card


I rarely make a card without stamps on it. But there are no stamps on my card today. 

The sentiment sticker is by Pebbles and is on a label sticker by Close to my Heart

The scalloped square die-cuts are by Spellbinders.
The round die-cut on top of them is by My Mind's Eye 

The patterned paper is by Cosmo Cricket
The ribbon that I wrapped around the corners is by Offray


Thanks for looking

Monday, May 17, 2021

Manly Monday a few Hockey Layouts


I'm working on my nephew's graduation book and this is one of the many hockey layouts that I will be posting.
The helmet stamp is from Stampin Up.

The date and jersey die-cuts were cut out using my Cricut. 

The circle patterned paper is by Colorbok.
I used the Creative Memories cutting system to cut out the circle.
The hockey patterned paper is Flair Designs.

The player sticker is by Jolee's.
The Red Wings sticker is an officially licensed sticker.
The hockey stick and puck is by Jolee's


The funny part about the picture below is the handmade shin guards.


This next hockey layout uses pictures from 2017.
Patterned paper by Flair Designs.
Puck and net stickers are by Creative Imaginations.
Cardstock strips are the bottom are from my stash
The sticker border in the center is unknown.
There are star brads and eyelets and star die cuts
I included number stickers

Thanks for looking

Saturday, May 15, 2021

Sister I’m here for you Card

Recently, my step sister’s Dad died without warning. So I made this card using an image from a recycled card. I thought it was an appropriate image to let her know that I’m, well, just what the sentiment says. I used my Cricut pens to create the sentiment. I printed it onto green vellum that already has a sticky back. Oh yeah. I need to use that stuff more often. The square die-cut is by Spellbinders.
Again nothing special. I’m still upstairs and have limited supplies.
Thanks for looking

Thursday, May 13, 2021

Sitting here...Thinking of you card


The bird on the branch was originally an ATC that I thought with a few added bits, it would make a nice card.

I made the sentiment by stamping these alphabet letters stamps from the dollar bin at Michael’s.
They are the second generation stamped.

 The dry embossing is a Cuttlebug folder.

The polkadot patterned paper is by Crate Papers. 

The inside sentiment says, “thinking of you”.
So all together it says, “Sitting here thinking of you”.


This will make a nice donation card.

Thanks for looking

Tuesday, May 11, 2021

Recycled card base with oval cards

Today I have an upcycled card set. The "patterned paper" is a card that I recycled. It just so happened that the same card had two similar arrangements of flowers on the inside and outside on the bottom. They both needed to hide some text. This made for the perfect area for an oval die-cut. The oval die-cut is by Spellbinders. The sentiment stamp is by Hero Arts. The felt butterfly die-cut is by Little Yellow Bicycle


For the 2nd card,
The chipboard, which is the pink polka dot flower, and the yellow frame for the flower is by Making Memories.
The yellow with pink circle in the center flower is by The Paper Studio. 
The border sticker is by Doodlebug. 


These cards are certainly not my favorites but I made them so I should post them. 
Thanks for looking

Monday, May 10, 2021

Manly Monday Man Card with Funny Print out


I’ve used this digital print out before and I still find it amusing.
It’s perfect for a dude. 
And so easy for me.

The patterned paper is by We R Memory Keepers 
And that’s it.


Thanks for looking

Sunday, May 09, 2021

3 die cuts on 2 Blue and Green cards

These card fronts have been in my “finish up” tote for awhile. Time to use them and get them mailed out.


The brads are from my stash. Feels nice to use products from my stash.
The sentiment is a stamp by Stampibilities.

The die-cuts are by Spellbinders.

The patterned paper is by Making Memories with distress ink around the edges


The second card, the borders are from Sunborn
All the other papers are scraps from my stash.
I don’t like the way that the glue makes the paper warp
I’m not sure what else to do with this card.
It will come to me. I’ll find something while I’m looking for something else.


I’m going to go a little bit off the camera to share with you some honest self evaluation.
I see some patterns in my workflow that could use improvement
When I “have” to do something and I’m bored with it, I find lots of other things to instead. I have examples followed by my excuse which I have listed as a defense.

1.Stamp names and dates on scraps of cardstock that I will use to label people in scrapbooks.
Defense-I will use those more than any of the other things that I’m going to list
1AFight with my Cricut and watch YouTube videos that don’t help.

2. Add designs of paper that are filed in the cabinet by design into the folders that are kept in totes which are divided by color.
Defense-I do not usually look at a picture and say, “This needs a polka dot pattern.” What I do is go over to my totes of paper and grab the folder with the color I’m looking for. There may be a polka dot paper in that folder and that’s the way I would find it. I’m not going to the polka dot paper folder.
That was confusing.  

3. Separate and organize colored paper in totes. 
Defense-There are so many shades of blue that I put like shades together in a folder to make it easier for me.

4.
 I take stamped images out of the drawer and find paper that matches. Then I put the paper and image into a baggy before moving it into the tote of cards to finish.
 Defense-this does make it easier for me when I quickly need to put a card together.

5. Organize the baggies so the same size bags are in the same folder using label maker and all.
Defense-another time saver.

7. Clean my craft room. This is a bad one. As I’m cleaning, I will come across many treasures. Some lost treasures.
Such as, finally finding that one paper I needed for this one  layout. 
Looking at everything around me I get bummed out and feel overwhelmed. 
Good and Bad News:
PS. I found the layout and it didn’t work, of course it didn’t. I even tried it on another popcorn layout and it didn’t work.

8. I will look online for inspiration, which I never seem to find on social media so I look at my old blog posts. I do find inspiration but I also find that a lot of my earlier blog posts don’t have labels, the links aren’t valid anymore, and the picture is small and sometimes with no watermark. So, fix the problems and it takes me forever because I’d number 9.
8A. So then, I’ve been wanting to do this... I want to grab all of my old Manly Monday posts and put my card on top of the post so it’s the first one you see. It’s never going to happen with my iPad unless I get a new oneI’m crazy! There are so many.a

9. Fight with iCloud to transfer my photos to my computer so the stupid thing stops telling me I have used 49 of my 50G and will need to upgrade to the next storage level. Why would I do that when I can’t find my 49G pictures and organize them the way I want too! That really makes me mad and usually ends with the worst one,
10. Go get something to eat 

That’s all I have to say about that.

Thanks for looking

Saturday, May 08, 2021

Cottage 2021 Calendar scrapbook layout


Today I have some of the calendar layouts.

This first layout, the patterned paper is by Die Cuts with a View.
The bottom borders are by Sunborn. The scallop is the negative of where the borders are attached together when you buy them. So you have the border with brown circle that is still attached to the packaging. Then above that is where the next border would have been but I removed it. So this is the negative of the removed scalloped border.

 I can’t think of another way to explain it.
Title die cut is by Cricut.


 For this Fourth of July layout, I used some label die cuts by Design Objective to create a banner. 
The red floss is by DMC
The stamps inside each label are by Lawn Fawn.
The firework diecuts are by Dies...to dies For. 
The glitter paper is by Recollections.
The polkadot patterned paper is by Die Cuts with a View.
The corner at the bottom, is a piece of red card stock cut with decorative scissors for the edge.


This next layout is part of a weekend that my husband and his friends do every year. It was quite cold and for whatever reason they were in the shed with the heater drinking beer. Why they didn’t go into the cottage is baffling to me. But, boys are dumb.

The die cut is by spellbinders and the little man sticker is by Close to my Heart.
The letters stickers are by Current.
The patterned paper is from my stash. 


For the next layout, I used the same letter stickers as the layout above.
The border punch is by Fiskars.
The stickers are from Creative Memories and Stickibilities. 
The pretty green patterned paper is fine Doodlebug.
I would guess that the green grass paper is by Colorbok.


Thanks for looking

Friday, May 07, 2021

Strawberry Berry Best Wishes Card


My iPad is so slow that I want to scream. Since I’m bed bound after surgery and a few falls, it is my only way to be online. This tension can not be good for me during recovery. “Calgon take me away”. Lol

The sentiment stamp is by Stamps for Life.

The die-cut is by Sizzix.
The border punch is by Fiskars.

The patterned paper and sticker are by Doodlebug.


Thanks for looking

Thursday, May 06, 2021

Red Crossing Ribbon with Eyelets Card


So what do you think...could I use this design to represent stitches from surgery and send as a get well card??
It would need something else to tie that together because right now it looks like a corset or maybe shoelaces.


Anyway,
The background stamp is by Stampin Up.
It was heat embossed with clear embossing powder and inked with red distress ink.

The eyelets are by Making Memories and the ribbon is from Michael's.

The paper underneath the ribbon was scrap paper that I sprayed with Glimmer Mist  by Tattered Angels.

I could not get these pieces to lay flat on the card. It drove me nuts but I had to move on.


These were the pieces I used to make this card.


Here is a  close up of the glimmer mist and the back side of the ribbon and eyelet piece of paper.


Thanks for looking

Wednesday, May 05, 2021

Second set of peacock cards

This is day 2 of the peacock cards. I had to break up the post of peacock cards and make it a two day thing.

Let’s start with the peacock stamp by Fiskars. Like yesterday, I colored the back of the stamp with distress markers before stamping it onto cardstock by Forever in Time.
Then, here is a generalized list of products for today’s cards. 

The patterned papers are by My Mind’s Eye,
K and Co. inked with distress ink, a wallpaper swatch, and 
The green polka paper with patterned paper by Scenic Route (Very old.)

All of the die cuts are by Spellbinders

Border punches by Fiskars 
White cardstock sprayed with glimmer mist by Tattered Angels 
The embossing plate is by Fiskars 

The first card has a textured Spellbinders die cut is cut out from a wallpaper swatch See the picture below.


The next card has a before and after because I kept thinking that it needed something.

Before 

After

So,  I added the green border punch is by Fiskars and a “hello” die cut by Lawn Fawn.

I can’t say that I love the results but it does look better to have the sprayed paper enclosed with the borders as well as giving it a universal any occasion “hello” die cut sentiment 


I took a picture of these two cards together because they have the same glimmer mist cardstock. The pictures also show the before and after with the card above.

Before


After


This next card uses 1 white die cut that I cut into two and glued one on the top and one on the bottom of the die cut with the peacock on it. 

I’m not a big fan of liquid adhesive and this is a good example why. I pushed the white die cut cardstock into the card front too hard and it shaped around the middle piece of paper.

At first, I was going to throw the whole thing away because I thought trying to “fix it” would make it worse. However, I  just ended up deciding that it wasn’t that big of a deal.


I took a picture of these next two cards next to each other because they use the same Spellbinders die-cut behind the peacocks but in different paper.


Thanks for looking