Showing posts with label Tutorial-masking with a twist. Show all posts

Sunday, August 03, 2014

Flower Vases with a Chalk Background Card

I'm posting this card for the Anything Goes challenge at Chalk Ah Lot.


I made my card using paint mixed with Stamp N Plus Stardust chalk and also their paint. Stunning look with this combination. Take a look.


I applied the mixture to a piece of thin patterned paper. Not much of a pattern but thin paper 


As you can see the mixture makes the paper distort until...


I run it through the Cuttlebug with an embossing folder. Isn't that a gorgeous-looking background? **I don't even want to put things on it. 

I finished the card off with minimal pieces to keep the person holding the card looking at the sparkle in the background.
I'm short on time (Hubby is waiting on me) so here are a few more photos.
You can get this Gina Marie embossing folder at Wholesalecraftingsupplies.com.


OK, Gotta go. Have a great rest of your weekend.

Wednesday, February 20, 2013

Nephew turns 11 card

Today is my Nephews 11th birthday and this is the card I made him. I thought the sentiment was perfect for this particular year. The sentiment stamp is by Stampin Up, the circle stamps are by Papertrey Ink and the center star is by Stampin Up. The ink used for this card, Hero Arts Shade inks, Close to my Heart and Stampin Up. I used a Inkadinkado masking paper to make the circle in the center and stamped my smaller circles around it. 
Thanks for looking.


Friday, September 21, 2012

Chalk tutorial


Welcome back to another powdered chalk tutorial. The Ginger chalk I use on my card is not on the Powder chalk website but you can order it by calling 715-271-1873. It's a fun red with a hint of yellow. 


I'm creating a fun background using powdered chalk, a cotton ball and a plastic overlay. You could simply use another piece of paper instead of the overlay but it's nice to see through the overlay to know where your next line goes.

I started by lining up the overlay in the corner. On the cotton ball I rubbed chalk against the seam in circular motion.

Then I moved the overlay in a counter clockwise fashion creating more lines giving my paper a starburst look.

Here's what I ended up with. Definitely not perfect but creative placement in my card covers up the imperfections. 

Here is my card using THIS flower stamp. I used the cotton ball around the edges of the image. The sentiment sticker is by Sticko/EK Success, cardstock by Provo Craft, patterned paper by Recollections and die cut by Spellbinders.

Thursday, March 10, 2011

Masking Technique with a twist

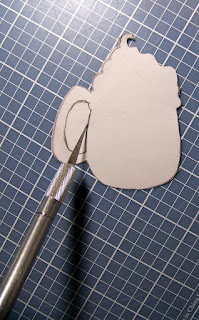
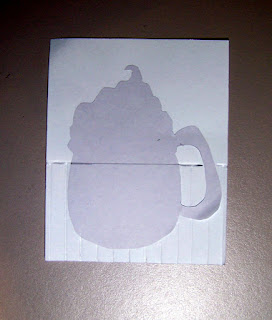
I made this tutorial on masking a digital image for I Did it Creations. Here are the pictures step by step as to how I did it and here is the link to the Picasa web album. The album gives an explanation of each photo and a few extra photos as well. If you share this tutorial please give the credit to me Cindy Groh. I worked very hard on this and would be hurt if someone took credit for that hard work. Thank you. If you make something using this tutorial leave me a link in the comments. I would love to see another view or take on it. Have a great day.


Here's the twist. I have a mask for the front of the image and the back of the image. The back mask allows me to score the lines into the cardstock up to the lines of the image. The scored lines are made on the back of the cardstock with the image on it and when flipped over looks like panelling on the front. I hope that makes sense.
Here is my finished card/project with this tutorial. I used patterned paper by Stampin' Up and K & Co, twine by Darice, brads by Oriental Trading Co, ink by Colorbox, label by American Crafts (i think) and letter stickers by K & Company. I hope this will inspire you to make a project with a mask on the front and back and see what creative project you can come up with. Post a link of your project in the comments so I can see it. That would totally make my day. Best wishes to all:)