Sunday, July 19, 2015

Cousins 2013

Here again with another layout for my Christmas card book. I don't even feel like I'm making a dent in it but I'll keep plugging away it and hopefully I can feel more accomplished by the end of the next week.

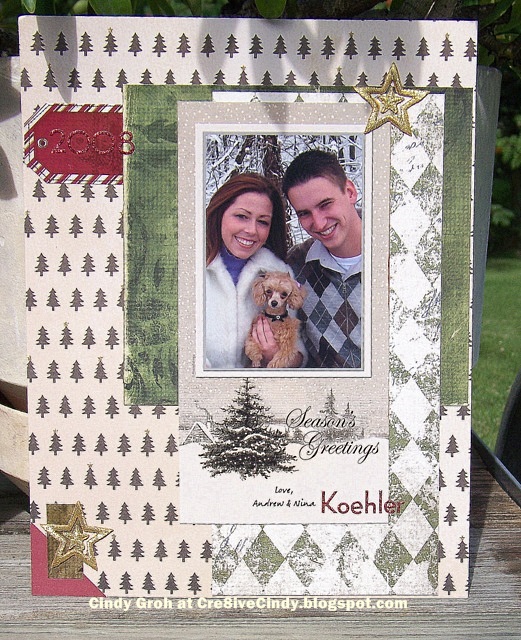
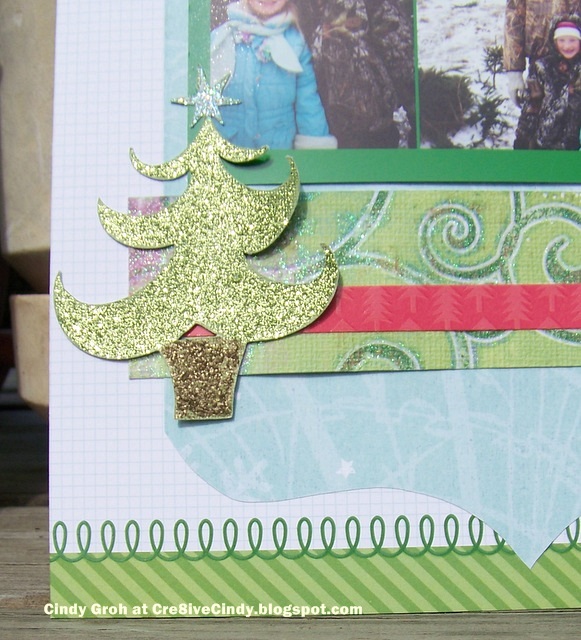
This layout follows a sketch from Sketches in Thyme, which you can see below. The patterned paper, hay chipboard and all cardstock in the layout are by Recollections. The green and blue larger elements were cut out by my Cricut and the cartridge was Art Philosophy by CTMH. The alphabet letters are die cuts by what use to be Quickutz. The sparkle circle stickers are by Foreveer in Time and the vellum sentiments are by Quick Quotes. The smaller circles at the top are Spellbinders dies.


Thanks for looking.

Saturday, July 18, 2015

Super Star Christmas Layout

 Here is another layout for my Christmas card book. I hope you are enjoying the layouts for a little bit here on my blog. I'll get back to cards shortly. I won't show you every layout I make for these books. I promise.

So this layout was inspired by the sketch at Stuck Sketches {see below}. I rotated it from the original way the sketch was set up and had to scale things differently because my page is 8 1/2 x 11. 

My background patterned paper is by Me and My Big Ideas and the two supporting papers are by Bo Bunny. The tag sticker on the upper left and rectangle sticker on the lower left are both by Bo Bunny. The rectangle was a "to and from" sticker with a candy on it. I cut off those two things off so the sticker would match the layout. The glitter letters are by Making Memories. 

The gold stars are from my MIL sewing stash. When she went into a home many boxes came to live with us. These two sizes of stars and silver too were quickly stashed away for later use. I ironed them onto my layout. I love to recycle like that.


Original sketch

I rotated it

http://doodleartifacts.blogspot.com/ AG {recycled star patches}
http://kcclayoutchallenges.blogspot.com/ 3 different patterned papers

Friday, July 17, 2015

Zip-Line Layout

I made another layout for my Christmas card book following a sketch from Sketches in Thyme. This one includes the Christmas card she made with the photo. So I'm not sure about the products for the card but the rest of it goes like this:
Cardstock by Recollections and Bazzill, Cricut cartridge Base Camp for the letters and Art Philosophy by CTMH for the arrows. The tiny circle punch is by Stampin Up and the largeer circles are cut out using the Creative Memories cutting system. The border stamp is by TPC Studio with in by Hero Arts. The date stamps are by Lawn Fawn. The rhinestones are by Jolee's, The General of Mercy {WTH?}, and Imaginisce. I write their names on the bottom circle with a Martha Stewart pen, which I hate and don't recommend. I think that is it.


Here is the original sketch

and rotated is how I used it.


Thanks for looking.

http://sketchesinthyme.blogspot.com/ Sketches in Thyme Shawn Week 3
My Favorite Things-Secondary color theory Blue and orange

Thursday, July 16, 2015

Christmas Card Layout 2010

So recently I decided to update my Christmas card scrapbooks. It started as one book for all the photo Christmas cards we receive each year and now I'm up to 3- 8 1/2 x 11 books. I think I will be able to get them caught up as long as I stay off the computer.

In June I was able to finish up two scrapbooks for a friend. She doesn't know it yet but I think she will be pleasantly surprised by them. Then already in July I managed to finish a cottage scrapbook that I needed to finish. It only took about 2 days time to pull it together because it was only 20 pages and the pictured were already scrapped on a calendar I made. The calendar was smaller then the book but it was nice and easy to rip apart the calendar and put those layouts in a 12x12 album. It turned out nice.

So on the list of things to get done, the Christmas card book is up and happening now. I used the sketch over at Scrap Much {see below} to create this fun colorful layout. I like that Julie is wearing a blue coat because it makes it a real nice accent color that is easy on the eyes.

The background paper and the red strip of paper are both by Craft Smith {Michael's}. The green swirly paper is by My Mind's Eye and the really light blue patterned paper that is behind the picture and expands to the bottom into a point is by K and Co. I used a piece of Doodlebug shaped paper to trace out the point for the blue paper. Then I hand cut it.

The Christmas tree is a Cricut cut but I'm not sure which one. However, the hat, on the right, is a Cricut cut from Winter Wonderland cartridge. For the tree I covered the top with green glitter glue by Hampton Arts and then the star and base are Stickles by Ranger Industries. For the hat I used Sunborn red cardstock, green sparkle paper by Doodlebug, and the snowflake in the center is the same light blue paper behind the photo {K and Co}. The number stickers are by Echo Park.

I hope you like it and thanks for stopping by.


http://kcclayoutchallenges.blogspot.com/ 3 or more patterned papers

Sassy Studio Designs Thank U

I'm using Snow white Honey for my card today. I printed her out onto Cryogen cardstock and colored her in with Copic markers. Then I die cut her out with a Spellbinders die. The yellow patterned paper is by Jillibean Soup. All of the cardstock is by Recollections. I did ink the red with some Stampin Up real red ink and the sentiment with Hero Arts Green Hills shadow ink. The sentiment die cut is by Stampin Up however I altered it from saying thankful to thank you. 


Thanks for looking.
http://designteamshowcase.com/2015/07/challenge-and-bloghop-16/ DT card
http://shopscrapmuch.blogspot.ca/ July color challenge

UPDATED 6-5-22

Wednesday, July 15, 2015

DW Turtle Thanks

I have a non stamping card today. This one involves Dreamweaver Stencils Sea Turtle and also this Thanks greeting. I received a package in the mail, a while back, from the then owner of Dreamweaver Stencils Lynell Harlow full of May Arts ribbon. This was one of the ribbons in the package and it had this sentiment on it with white embossing paste. I felt like I had found a treasure and had to hang on to it like the hoarder I am. But recently I ran across it and decided to use it on my turtle card. So I can't take credit for the sentiment however the turtle is dry embossed and then inked with distress inks and an ink blending tool. I think he turned out cute. I matted him onto an aqua cardstock by Sunborn and then the green paper is by Cherry Arte {not sure if they are still around or not} and the aqua patterned paper is from my stash unmarked.


Thanks for looking.

Monday, July 13, 2015

Manly Monday Mr Fix It

Edited April 2021: See the sidebar for explanation. 

For my Manly Monday card today I am using a tool stamp by Stamp N Plus. I stamped it all over this piece of watercolor paper by Strathmore with Hero Arts black ink. Then I filled in the tools with powdered chalk {Glitzy} mixed with paint also by Stamp N Plus. I matted that piece to black cardstock and then to grey cardstock before adding the panels to my card base. The wrench and and nuts are stickers by Sticko/EK Success and they are on a lighter color of grey cardstock.

Pretty simple and easy today. I hope you like it.


Welcome back to Manly Monday where I share some masculine cards I found in blogland. Click on the name of the blog to be directed to the masculine card. Then come back and check out my cool tool card. 


Thanks for looking.

Sunday, July 12, 2015

Upsy Daisy Orange

This Stampin Up Upsy Daisy stamp is still one of my favorites for all types of cards. For today's card I colored the rubber stamp with distress markers and then sprayed it with water before stamping it onto some watercolor paper by Ranger. The polka dot paper is by Studio G and the background paper is by My Mind's Eye. The sentiment stamp is unknown but it is stamped with Hero Arts black ink onto a Cuttlebug die cut. The ribbon is from my stash.


Thanks for looking

Saturday, July 11, 2015

Hero Arts Flower card

Today's card uses a background stamp by Hero Arts. I heat embossed the image with white embossing powder. Then using an ink blending tool I brought in the distress ink colors yellow, pink, and green. It's such a pretty pattern that it doesn't take much to make the card like this shine. The sentiment stamp is unknown but the yellow cardstock is by Bazzill with a Lifestyle Crafts die. I embellished with Want 2 Scrap rhinestones.


Thanks for looking.

Friday, July 10, 2015

You Shine Girl!

In today's card I'm using a City Girl stamp by Deep Red Stamps. You can find them at 

or

I stamped her onto Neenah white cardstock and colored her in with Copic markers. The background of the card is a Crafter's Workshop stencil with silver embossing paste by Dreamweaver Stencils. The silver ribbon is by Stampin Up, pink cardstock by Recollections, and the sentiment stickers are by SRM Stickers. 


Thanks for looking.

Thursday, July 09, 2015

SSD Christmas in July

There's a new challenge up on the Sassy Studio Designs blog for this lovely Thursday and the theme is Christmas in July. 

I used this All Wrapped Up Sassy, which I can't find in the store to link you to it and in fact I think it may have been discontinued/retired recently. Sorry about that. I'm trying to better store my digi's so I know which ones are retired and therefore not use them as much as possible. This gal was already colored in with the exception of the bows and shoes. I colored those to match this Bazzill patterned paper. The strip of pink patterned paper at the bottom is by Making Memories and it is cut with a Spellbinders border die and embellished with an American Crafts Christmas zig zag rub-on and a snowflake sticker by Jolee's. Underneath that border is an EK Success border in white and on top of that die is a Westrim Crafts Christmas Tree. 


Just a side note for you, Sassy Studio Designs is always looking for a guest designer and it could be you. Every month they hold a contest for the best Sassy girl or guy to play with use designers for a whole month. Check out all the details on THIS POST and try for it today. The DT is really a fabulous group of peeps to spend time with.

http://thegloryofchristmaschallenge.blogspot.de/ Gifts
http://craftycalendarchallenge.blogspot.com/ Christmas in July
http://simplycreatetoo.blogspot.com/ Get ahead for Christmas
http://digichoosday.blogspot.co.uk/ Christmas in July
Little Claire-Holidays
http://thepapershelter.blogspot.com/ Holiday time
http://designteamshowcase.com/2015/07/challenge-and-bloghop-16/ DT card

Thanks for looking.

Wednesday, July 08, 2015

Hi Flowers

I have a simple and fun summer card for you today. I dry embossed the background cardstock with a Darice embossing folders. The cardstock is by Stampin Up. The tag is thick chip board that I wasn't even going to try and put an eyelet through that hole. The flowers are so old. They were a freebie for some promotional gig way back when they would send out paper magazines. I just added a green leaf with cardstock by Color Aid and die cut out with my Cricut. The same is true for the sentiment. All of this is adhered onto a 5.5 x 4 card base by Recollections.


Thanks for looking.

Tuesday, July 07, 2015

Birthday Fishes

Birthday Fishes for anyone celebrating a birthday today. I have a fun fish card to share with a fish stamp by Stamp N Plus. I colored it with distress markers and sprayed it with water before I stamped it onto the white cardstock. I then used a Dreamweaver Stencils nesting frames die to cut it out. The background patterned paper is by Basic Grey with the blue patterned paper by My Mind's Eye. I did ink around the edges of the patterned papers to draw your eyes to the fish image. 

I die cut the words out using my Cricut and I believe it is the Wild Card cartridge. I welded the letters together in the Cricut Craft Room program. The paper is watercolor paper by Strathmore and so I wanted to get a watercolor affect. I taped a few distress ink pads onto my surface and sprayed them heavily with water. I ran the words through the mixture a few times and set aside to dry.


Thanks for looking.
http://clearitoutchallenge.blogspot.com/ AG
http://creativecardcrew.blogspot.com/ Die cuts
http://papertakeweekly.blogspot.com/ AG
http://artisticinspirationschallenges.blogspot.co.uk/ AG
http://craftingfromtheheartchallengeblog.blogspot.com/ AG
http://www.craftyourpassionchallenges.blogspot.com/ AG
http://notjustcardschallenges.blogspot.co.uk/ AG
http://scrapbookstampsocietychallengeblog.blogspot.com/ AG
http://thepapernestdollschallenge.blogspot.com/ AG
http://jwscrapshack.blogspot.ca/ AG
http://fairytale-challengeblog.blogspot.com/ Under the sea

Monday, July 06, 2015

Manly Monday Frog

Manly Monday today is for a teenage boy in our family. Wednesday is his birthday so I used a stamp from Stamp N Plus. I colored the rubber stamp with distress markers then sprayed the stamp with water and applied pressure to the stamp onto white cardstock. I sprayed the image a second time and stamped it again and this is how it turned out. The background paper is by Studio G and the sentiment is cut out using my Cricut.


Sunday, July 05, 2015

Berry Best Wishes

A quick card today as I am up at the cottage with no wifi. The strawberry stamp is by Stamp N Plus and I just used two different color inks to create the look. The tag is by Recollections and embossing folder by Darice. The strawberry and red patterned papers are by Die Cuts with a View and the green polka dot paper is by Sunborn. The ribbon is by Offray, scallop circle punch by Stampin Up, rhinestones by Want 2 Scrap {colored red with Copic marker}, kraft cardstock by Oriental Trading Co and red cardstock by Recollections. The sentiment stamp is by a company no longer in business which is a shame since they were so cute.


Thanks for looking.