Hi everyone!
Welcome to my first post of Fabulous Friday Fun where I will be demonstrating techniques, giving product reviews, and just showing you some of the tips I've learned throughout my time as a paper crafter.
Let's start off with a very brief introduction. My name is Cindy and I reside in Western Michigan. I'm married to my best buddy and together we have a very big spoiled dog. I started as a scrapbooker and then went into making cards about 5 years ago. I still scrapbook but enjoy the process of making cards a little bit more, for now.
I have taken classes from Tim Holtz, Melissa Frances, Suzanne J. Dean, and different manufacturers in the paper crafting industry. I recently started teaching card classes at a local scrapbook store and really enjoy sharing my time and knowledge with others.
If you would like to follow my blog at cre8ivecindy.blogspot.com you will see a new creation every day. I'd love it if you would follow me because I have a giveaway plan that I think would be fun for someone to win prizes. More to come on that.
Enough about me, let's get into today's fun technique. I love my Cuttlebug. So today we are going to learn about inking your embossing folder to create two different effects.
Here are the tools you will need:
1. An embossing machine such as the Cuttlebug, Big Shot by Sizzix, Vagabond, Sizzix Texture Boutique, Grand Calibur by Spellbinders and there are more that I am missing, I'm sure.
I have the Cuttlebug so I will speak in Cuttlebug terms.
2. A well-inked distressing ink pad. We are using distressing inks because it dries a little bit slower than water-based dye ink pads and it comes off easily with soap and water.
3. The embossing plates to your machine. Cuttlebug users are using A, B and B.
4. The embossing folder
5. The size or shape of paper you want to use. See the photo below.
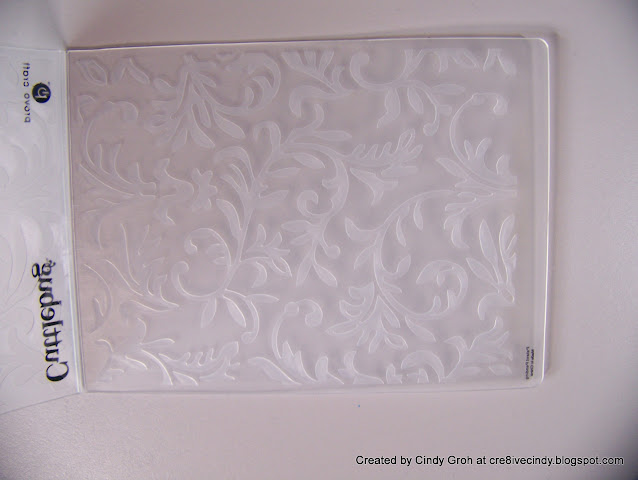
There is a positive and negative side to most embossing folders. The positive side will be the side in which the design of the folder is concave and therefore, the design is raised once you run it through your machine. See photo.
So we are going to ink this positive side first and then I will show you the negative side.
We need to ink our positive side with a well-inked distressing ink pad.
Press the pad lightly onto the embossing folder. The drier the pad, the harder you have to push down to get ink on the embossing folder, which can be cool if you are going for that kind of look. See the below photos:
Place the paper in between the embossing folder and run it through your embossing machine.
When you take the paper out of the embossing folder you have the background inked and the raised pattern is the color of your paper. You can see where I pushed too hard with the ink pad because there is ink on the raised pattern. Like this:
Here is the card I made using this technique:
Onto the next part: On the negative side of the embossing folder, the design/pattern is raised up on the folder. This one is tricky. You need to get the ink on that raised part only. The fun part is if you don't achieve that perfection it gives a cool distressed look. Check out the photos below of the negative side of the embossing folder without and with ink:
Then run it through your embossing machine and you end up with an image like this:
Here is the card I made using this technique:
As you can tell I didn't get the technique perfect but inking the edges with a distressing tool made the cheesecloth background stamp look distressed.
I hope you enjoyed the first addition to Fabulous Friday Fun.
A couple of things to note are these:
I will be posting this on my personal blog on Friday's too. Become a follower of my blog, use this technique and leave me a link in the comments before the next Fabulous Friday Fun and you can win a prize from me. I make you become a follower so I can get contact you if you win.
Many of the supplies that I have used for this project can be found in our Outlaw Women Scrapbook Emporium.
(NO LONGER IN BUSINESS)
(NO LONGER IN BUSINESS)
It is a Yahoo Group that you can join if you would like to be a part of a fabulous group of people who chat about everything under the sun, hold swaps and challenges, too.
It is a discount club, so once you are accepted, you can get great discounts on so many paper crafting supplies, like those that I used for my project.
We hope that you join us there for a lot of fun and learning!
See you all next Friday for another FABULOUS FRIDAY FUN!
Cindy
UPDATED LABELS, FONT SIZE, PIC SIZE, TITLE, LINKS, AND A SMALL AMOUNT OF WORDING ON 11/9/21


3 comments:
Hi Cindy...I couldn't wait to try this technique. Love it, but it will take some practice and maybe some better inks to get the desired look. TFS!
:O)
Jessica
http://jessicascraftshaque.blogspot.com/2011/10/family-ties-are-bound-by-love.html
Hi again Cindy,
My following privileges have been a bit crazy lately...I tried to follow, but don't see you on my dashboard. So, I am bookmarking your blog until the "kinks" get worked out!
:O)
Jessica
Thanks Jessica:) You are too kind.
Post a Comment