Tuesday, August 30, 2022

Loads of Cards to celebrate a milestone


Good morning. Today is a special day for my blog and oddly enough I’ve been putting it off all month. I wanted to post it in August because I started my blog in August of 2009. 
Why did I start a blog? Because all of the cool kids had blogs and I wanted to be in with the cool kids. However, a few years ago I came to the realization that my blog was more of an archive for my scrapbook layouts, cards, ATC’s, calendar layouts, and a handful of other projects.
Well, today I’m my own cool kid. Why?Because today marks the day that’s I’ve posted to my blog

4000 times!

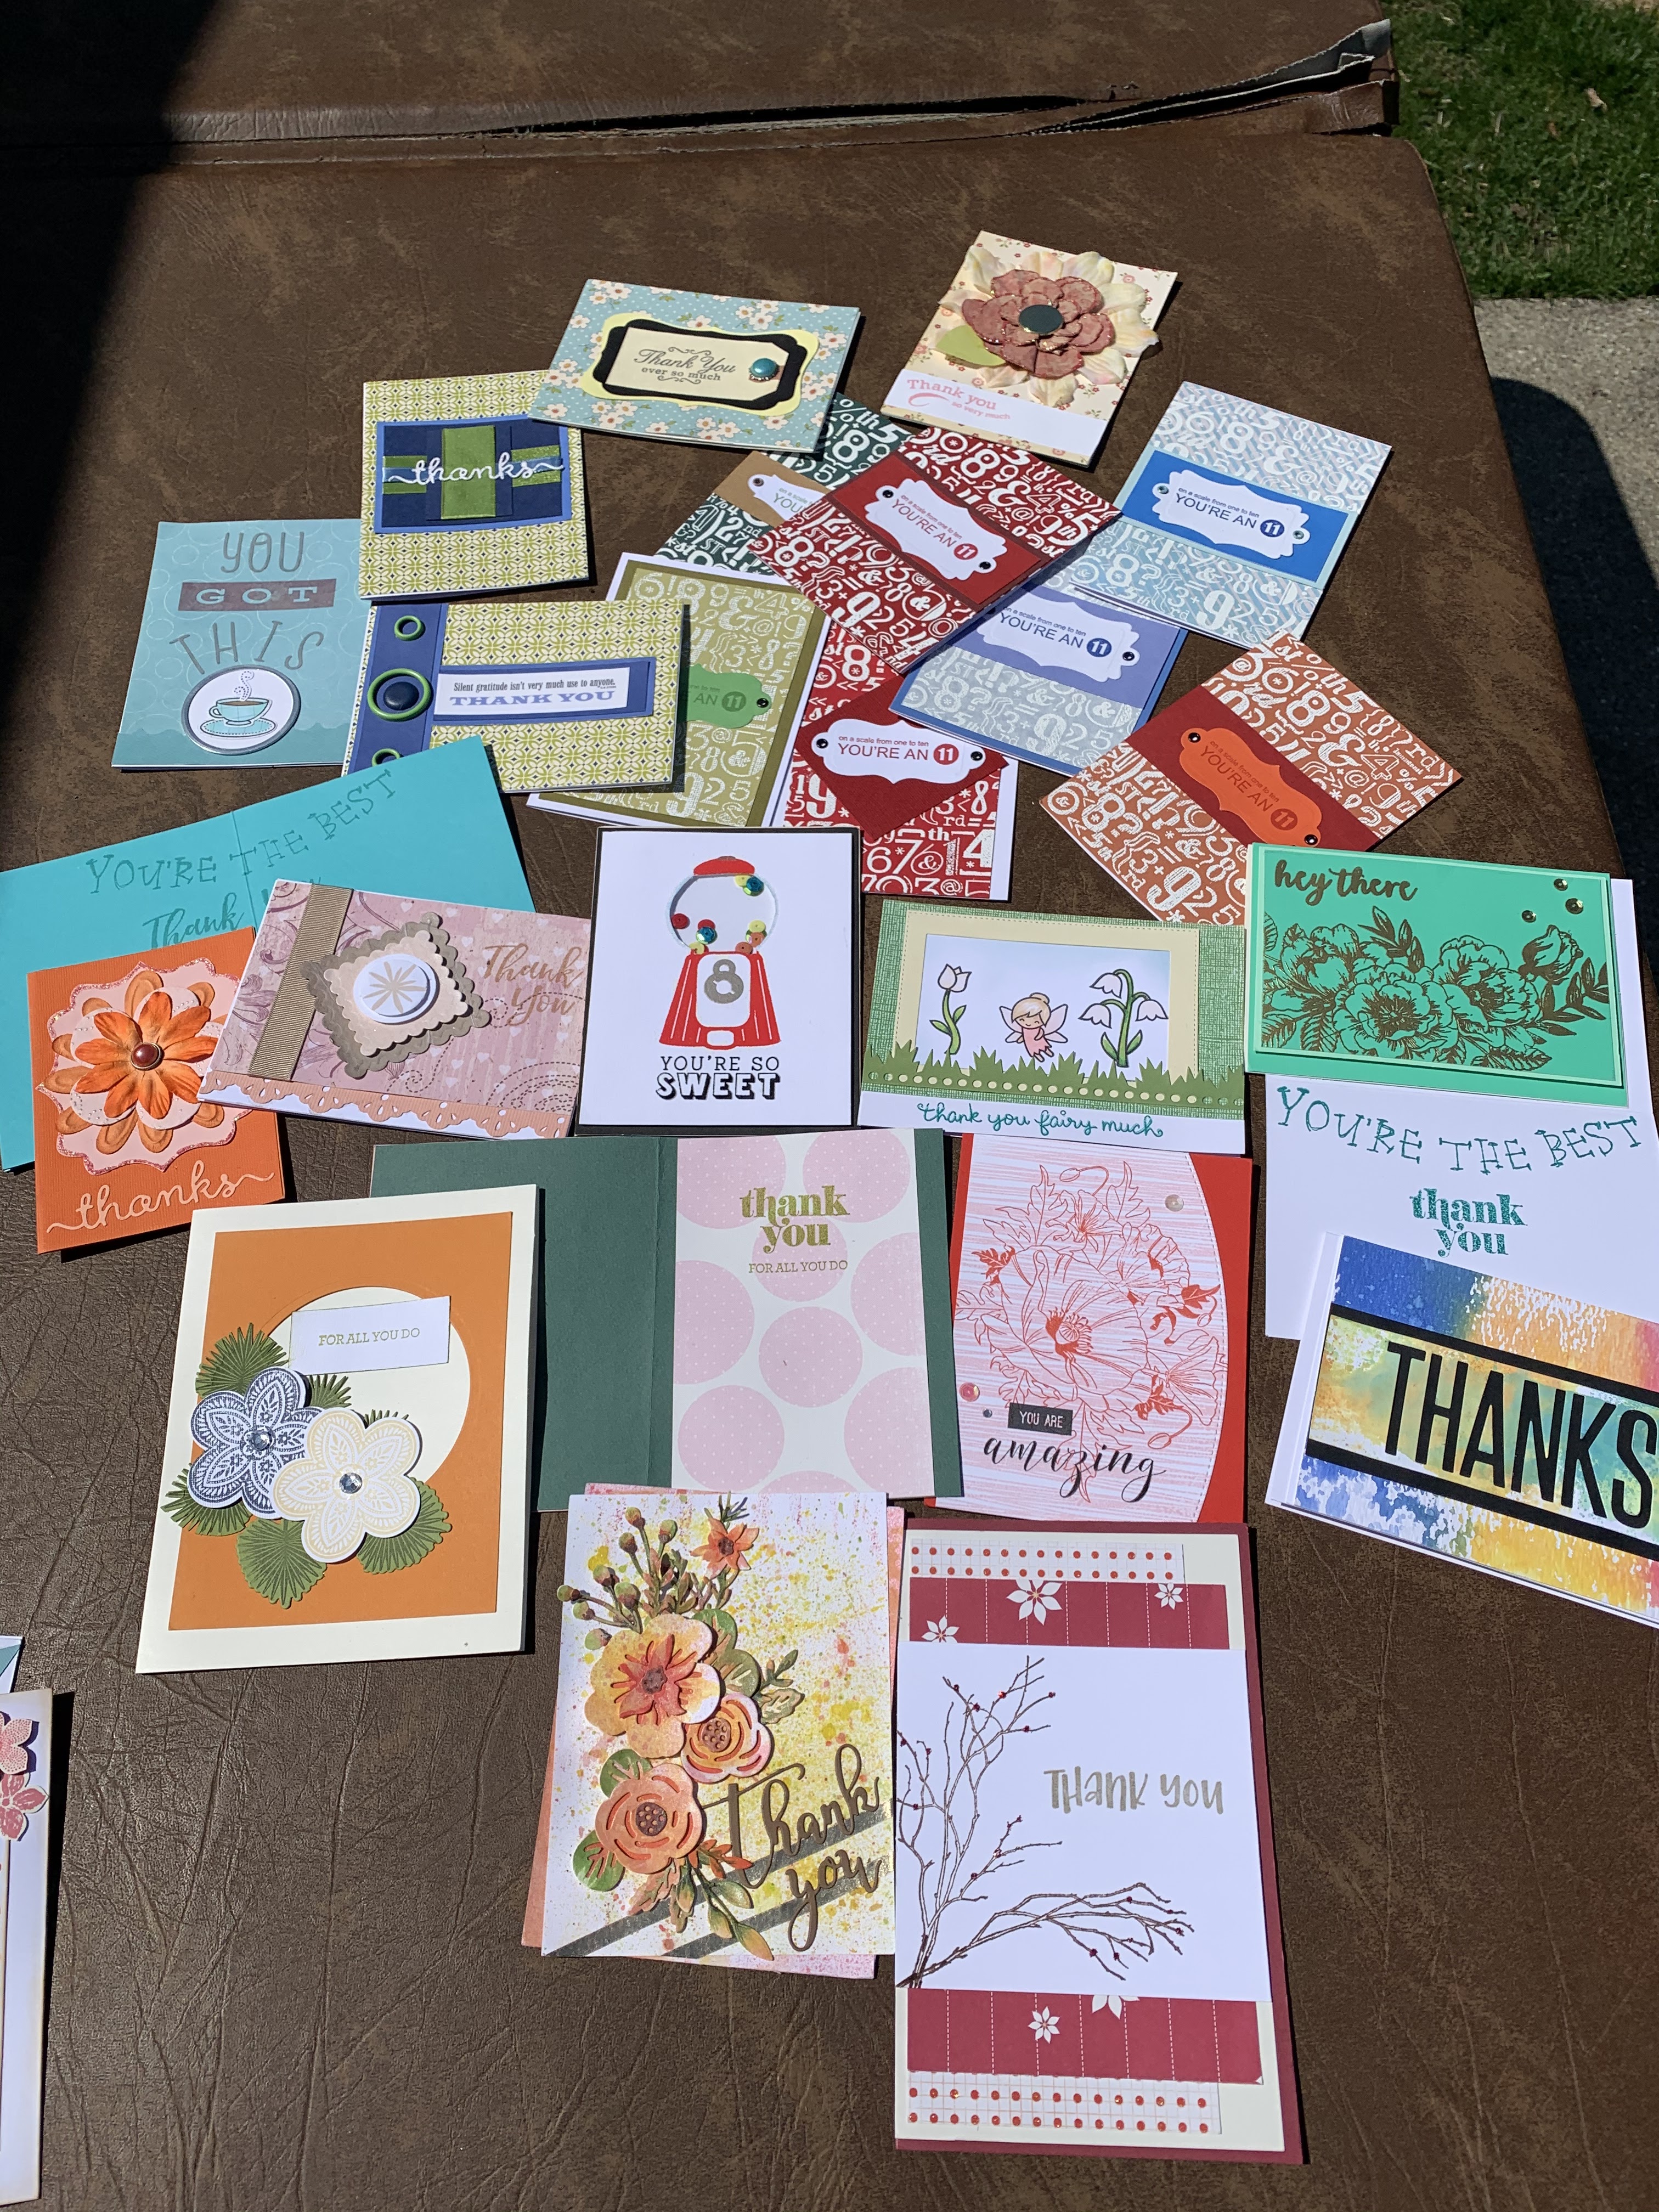
Crazy right? So in honor of this amazing milestone, I put together some pictures of groups of  cards. They are recent cards and have been previously posted but maybe not as a group. I’m going to look on my PC for older group pictures. Screw all that other shit that I talk about after the pictures, I’m proud of my creations so check ‘em out.

From 2011
All of the magazines that I was published in.


This is my blah, blah, blah and it’s 
taking me forever to put together. Disclaimer, the following information will have typos and terrible grammar.

Throughout the years this blog has been a place for my deepest love for paper crafting which is stamping. So I started a collection of all forms of stamps: rubber stamps, acrylic stamps, foam stamps, rolling stamps, and what’s this? Digital stamps.

With those stamps, I started to have storage issues. 

With those stamps, I had to have Copic markers. Again, I wanted to be a cool kid. 

With those stamps, I had to do challenges and I wanted to win the prize, which was usually an insignificant prize but I 
I wanted my blog to be recognized by a company to show how much talent I have so that, 

With those stamps, I’d be chosen to be on design teams. You would get free stuff from companies. How cool would that be…hmm. It’s funny how I figured out that striving for a place on a design team limited you to only using only their products. Was it a waste of time? No, because I grew as a person I wasn’t I’ve done different things on this blog that no one else has ever done. 
With those stamps, I’ve been writing this post milestone post for over 2 hours. Peace and love to all.
Thanks for looking. 

Wednesday, August 24, 2022

Calendar scrapbook layout August. Bark River

   
This is from the home calendar Aug 2022-
PP by Reminisce. Letter sticker by Current. 
Thanks for looking

Sunday, August 21, 2022

Just for you card

I really like the way this came together. The vine stamp was colored in a while ago with colored pencils and Copics. It then went into the drawer.

I fussy cut the one side and it really stands out with the black cardstock underneath it. The patterned paper is from My Mind’s Eye and the sentiment is by Stampibilities. Thanks for looking. 

Friday, August 19, 2022

Floral Friday Wishing You card with stacking die cuts

 The patterned paper is by My Mind's Eye. The die cut closest to the background paper is a wallpaper sample and the second one is glitter cardstock. Both of those dies are by Spellbinders. The square is a die I bought on eBay. The flower stamp is by Stampin Up. I colored it in with Copic markers. The outside die cut frame and sentiment are by Creative Expressions. Thanks for looking. I'm entering my card into the challenge at Happy Little Stampers.

Thursday, August 18, 2022

Feminine Cards With a side door feature

I got some new dies. I love this one on the front. And what I love even more is the Gemini cut it out beautifully.
It’s a crappy view of how it stands up.

On this second card, the front flap is plain…oh no. Look again. I die cut the end and have it in a slit made on the left side..


These were inspired by this card making summit that I attended a couple of weeks ago. This card design was from Erin Reed Makes. The design is kind of strange but it worked with these pretty papers by My Minds Eye. Thanks for looking.

Wednesday, August 17, 2022

August Calendar layout mimicking the building

Here’s another layout where I tried too hard to pull it together and it wasn’t worth  it because no one noticed it. I tried to make the side border look like the windows in the building behind us. Anyway…Thanks for looking. HAGD! 

Painting for Surprise Loose Change Scrapbook Calendar Layout


I really like this layout. I used scraps of paper to create the background which matches the outside of our cottage.
 Then I cut out the super cute bucket and paint brush with my Cricut 
The surprise label is by The Paper Loft. I never thought I would use it but kept it around, “just in case.”  It has been in my stash for 10 years if not longer. I think it was 2009 that my mom and I went to Novi, Michigan for the scrapbook convention where we took classes. The different companies would give you the supplies to make layouts for us to put together while they teach us different techniques to go with the layouts. 

It was there that I took class from the famous Tim Holtz. It was more way more expensive but was worth every penny. 
He gave us so much information and had so much positivity. Just a really good educational class that I use those techniques over and over again. 

It was cool how we were made to sit by somebody that you didn’t know. Talk about vulnerable. But it was a really good idea. You could learn from the class and not socialize with your friends during class.
It really takes you out of your comfort zone being with the people that you don’t know. 

 Everyone was in groups of three except for myself and the other lady I was with. That worked to our advantage. You see, at the end of the class he told us to divide up the distress ink pads that we had been using in our group. It was evenly divided as you would take turns choosing which distress inks that you would like to keep. Everyone else had to divide their pads by three and my lady and I divided ours by two. And we exchanged well as in she took colors that I didn’t want. I thought it was really cool
that we got to keep the
Thanks for looking

Monday, August 15, 2022

Manly Monday Gabe Junior year Scrapbook layout

Cindy Groh

I will update this post with his school picture. Patterned paper by Bo Bunny. Alphabet stamps by Stampin Up. The blue on blue music note stamps are from Stampibilities. 

The Cricut did all kinds of work on this layout. 1st it wrote on the vellum down the right side of the photo. 2nd the percussion is a draw and cut. 3rd it cut out the title. That G is having issues. 

Thanks for looking 

Wednesday, August 10, 2022

August Calendar Layout of us at Cedar Springs Brewery

The border is be Sunborn. I put the two straight edges together and put the blue pearls border over the seam. The pretzel stamp is by Tim Holtz which I colored in with Copic markers and then inked the edges with distress ink. The beer bottle eyelet is by Eyelet Outlet. Thanks for looking.

” Candy is dandy, but liquor is quicker.” – – Ogden Nash

Monday, August 08, 2022

Manly Monday Poker BIL's Card


This is the front of the card. The crimper is by Fiskars. The little playing cards are dies by Quickutz. The patterned paper underneath the straight flush is by Tim Holtz. I'm not sure about the bottle cap but it beautifully fits in as a 10 of hearts. The alphabet stamps are by Oriental Trading Co. It's a great little set. 
And this is the inside of the card. The inside letters are Michael's. I thought it was witty
Straight Flush? Nope! 4 of a kind for our 7 card stud 
because he turned 47
But now that I read again, it's hard to understand.

This is a fabric that I used heat and bond to attach the fabric to the cardstock.
Cricut cut the four and seven.
And then I tripped on the finish line and cut the word kind in the wrong spot. It turned out fine.
Thanks for looking.

Thursday, July 21, 2022

Candy Cane Lane card with a double heat embossing

This card is something else. I loved doing it and I need to find a different embossing folder to try the same technique, agree? And I will take ideas/requests
There are way too many pictures but sometimes that’s the way it goes. 
The embossing folder is by We R Memory Keepers. It's a little bit longer, so that's why I could line up the design. Meaning I could do this technique because the opposite, embossed and debossed was longer and could line up. (that was a horribly long run-on sentence.) 
The embossing folder is 3" wide. Therefore, these are 3 separate pieces of cardstock. (I think I said that)
I dry embossed 2 pieces of red cardstock and I'm not sure if they are from the same manufacturer they look like two shades of red. I hate the shades of red cardstock and how they are hard to match up. I probably didn't think the idea would work. 
>Click<My cousin used to obsess over the shades of red and I would be so Rrrr, "Just pick a piece of red paper!" So one day I ran into a problem with matching reds so I fanned out the pieces of red cardstock all over my desk and took a picture. I texted her the picture and apologized for those times that she couldn't find just the right red to match her son's shirt when we were scrapbooking. She appreciated the apology. 
>Click< Back- moving on with the tour. 
Then I dry embossed a shimmery white cardstock. 
I took a red "Wet Looks" Marvy embossing marker colored it into the debossed pattern and then heat embossed it with red embossing powder.
I did the same thing for the red cardstock but in white. The embossing marker is Embossing Dual Pen 11 #81 Clear by Tsukineko and used Hero Arts white embossing powder to finish the job. 
I must say that I didn't use a powder bag before heat embossing and it shows with embossing powder everywhere. For the first time with such a technique, I'm all good with that.  
I trimmed the panel down and gave it a nice white border on the sides. The sentiment is one of Cricut's print and cut. 

This post was stupid long and way too wordy with probably many grammatical errors. This may be why I didn't want to post it. Thanks for sticking with me. Thanks for looking.
Monday, July 18, 2022

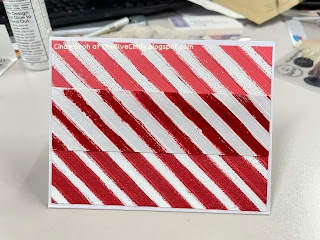
Manly Monday stripes with square stamped border

Patterned paper is by My Mind’s Eye. Creative Memories square punch. Stampin up little stamps inside using Simon Says Stamp. Scrap paper for the sentiment. Thank you for looking.


Wednesday, July 13, 2022

Calendar page July at GA (Not a USA layout)

July but not the USA-  the patterned paper companies are Making Memories, Stampin Up, and Creative Memories. Circle dies were cut with Cricut. The flowers that I fussy cut are by My Mind's Eye.
There are Stamp by The Paper Co (smile and Memories in the Making) 
The small gems are by Forever in time. Thanks for looking.
Saturday, July 09, 2022

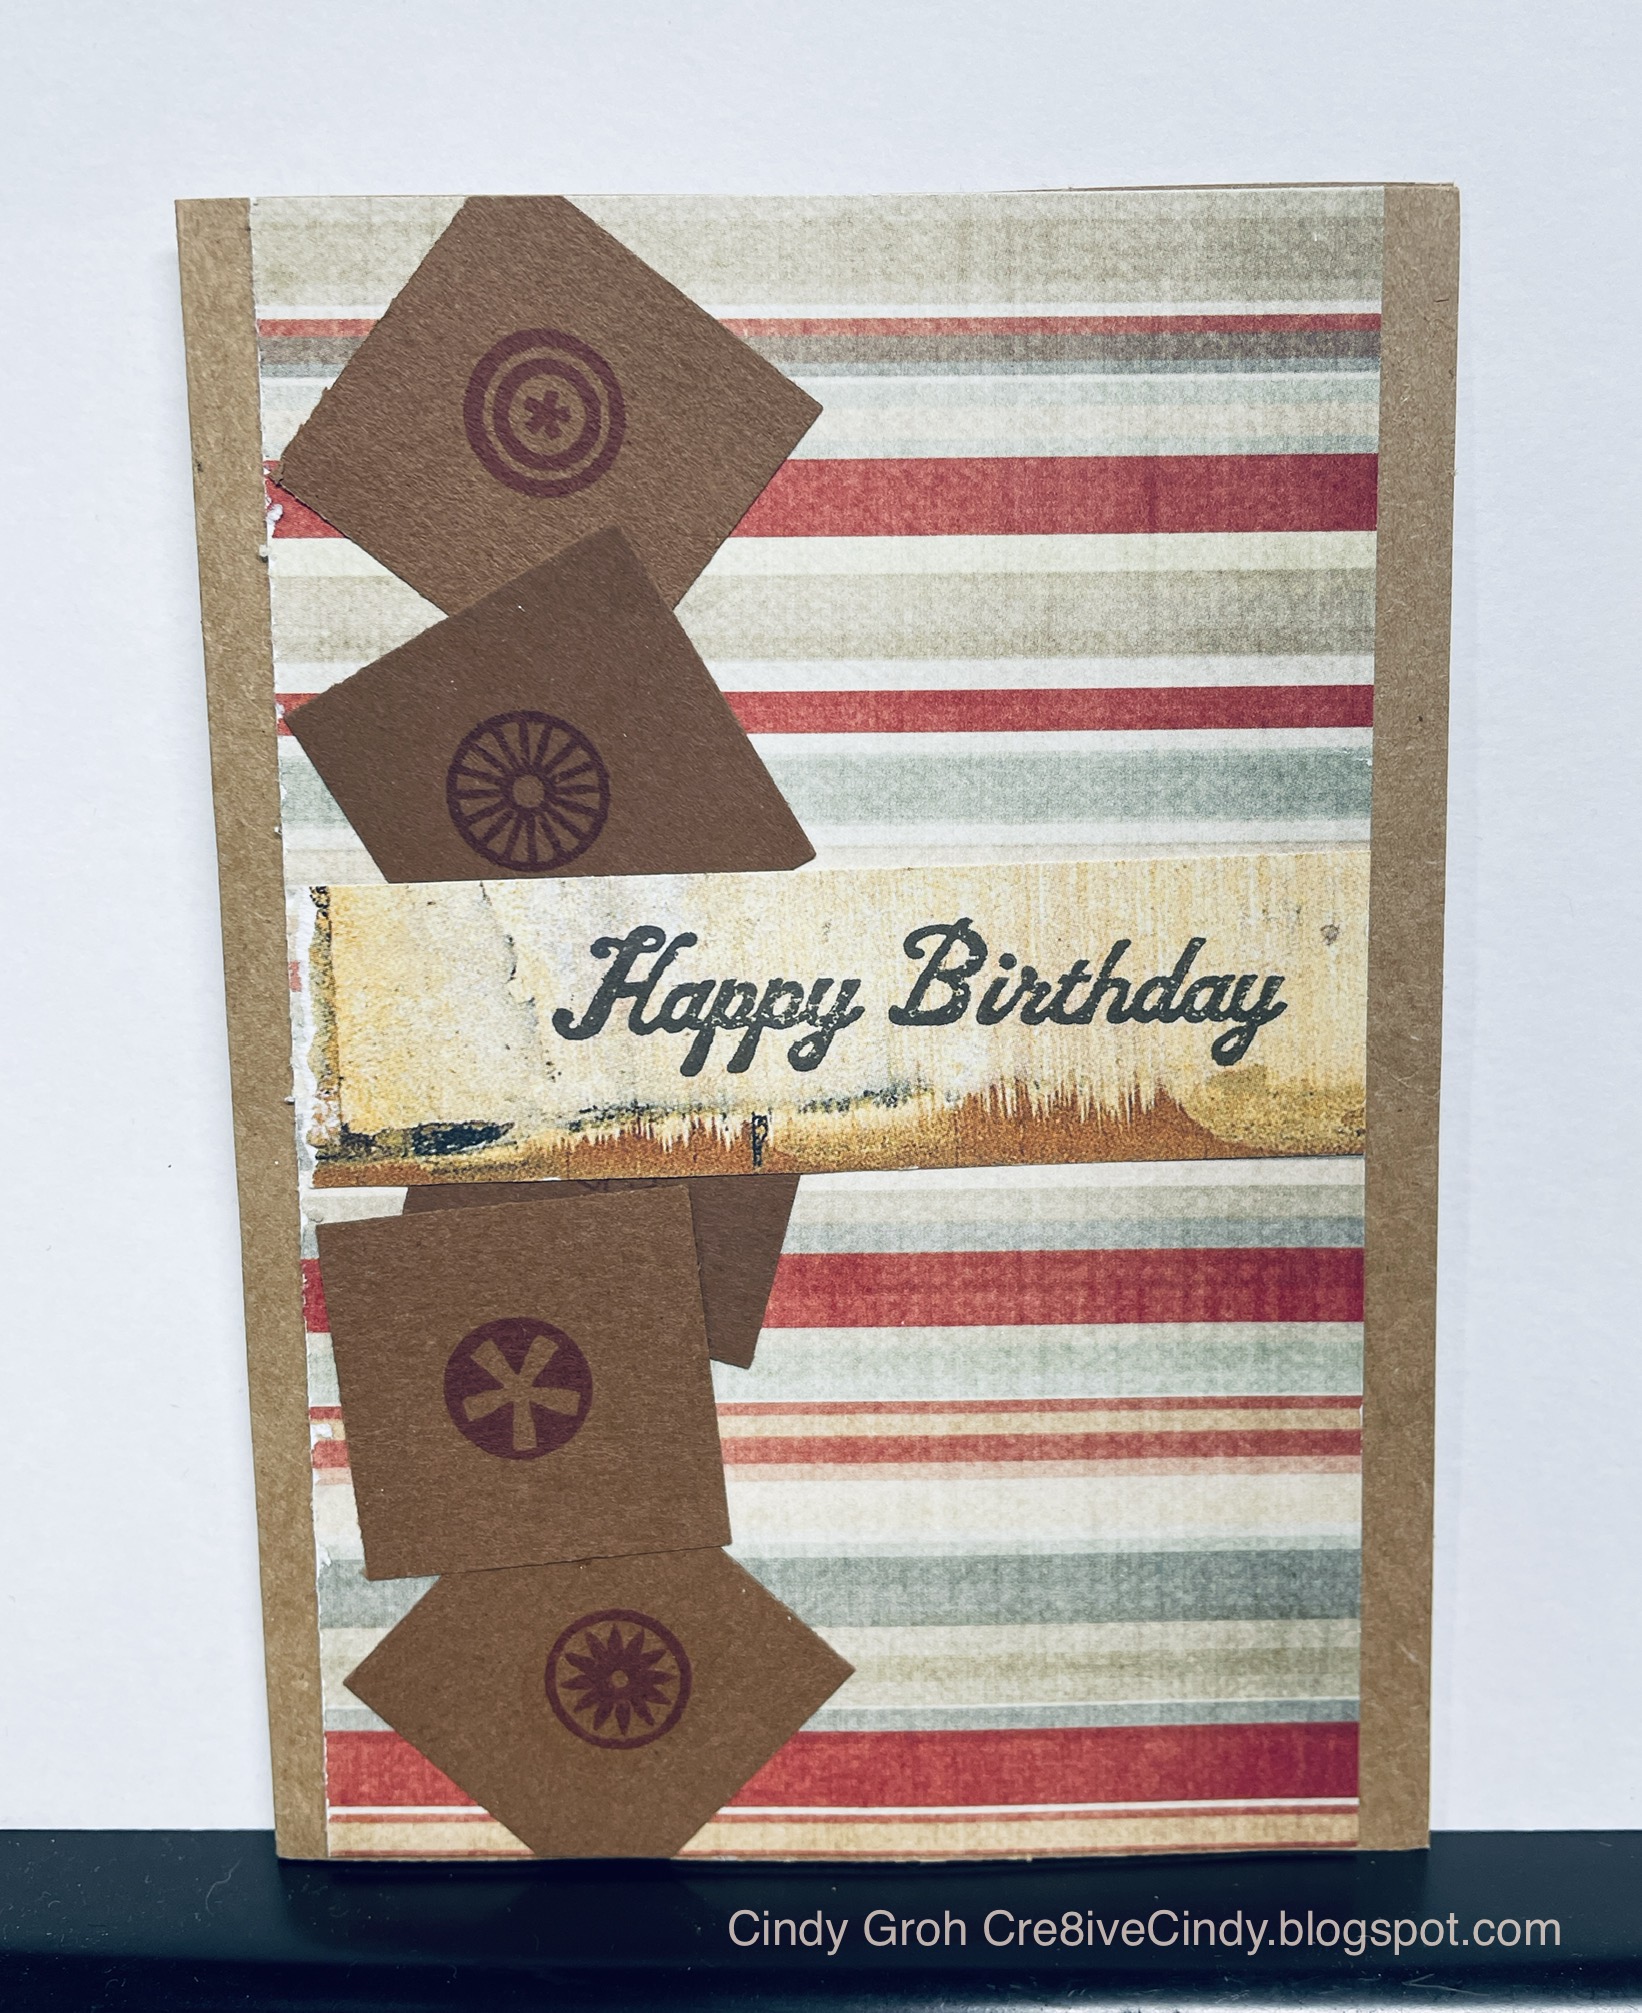
Simple Snowmen in a buckle Christmas Card

This fun stamp is from Stampin Up. I colored it with Copic markers. The rest of the card are scraps from my stash. Thanks for looking.

Thursday, July 07, 2022

Pink and Red Glittery Noel Christmas Cards

The glitter paper is by Doodlebug. The Noel is by Craft Smith and the Joy is cut out from a Die Cuts with a View paper pad. Two Christmas cards are done and the glitter paper is out of my stash. Thanks for looking.

Wednesday, July 06, 2022

July Calendar Layout using a former card


July Calendar 2019 and this calendar is done!!!
Bell stamp by Deep Red Stamp. It was heat embossed silver
Patterned paper by Bo Bunny. White cardstock by RE that was inked with distress ink. Star stencil is a Cricut negative with glimmer mist. Star border is by Cricut and also sprayed with glimmer mist
Star brad by Creative Imaginations.
I had a hard time finding all of my 4th of July creations. But here are a few.
Layout using the bell stamp
July fourth Calendar LO
Star Card
Statue of Liberty
Statue of Liberty-2

Thanks for looking

Monday, July 04, 2022

Manly Monday heat embossed star, and a background made of scraps Card

Happy Fourth of July

The stamp is by Stampin Up and it was heat embossed with a blue glitter embossing powder. The sentiment is also from Stampin up. The tag and paper are unknown. Thanks for looking.
Thanks for looking.
A few links to patriotic cards.
Stand together
Vintage American Flag Atc's
American Flag

I also have This dragonfly card with the same scraps.

I made the card yesterday at the same time as this one. I thought it was interesting to see the two next to each other.
The dragonfly was cut using my Cricut from the image set called Spring Fling.
I layered it to make the wings lift up a little bit.
The patterned paper that is green is unknown but the blue is by Sunborn
So the blue had been part of a glue drip accident. 
Therefore, I colored him with a flicking motion with a Crayola Brush Tip marker.
Then...I threw it in my drawer. So when I made this background from blue scraps of paper and I looked in the drawer and came across this dragonfly. So, they look okay together. I added a sentiment by Hampton Arts. Thanks for...Oh wait, there’s more...
Here are some other cards that I found when I put the word dragonfly in the search box. The cards are all different. 

 Thanks so much for looking.

Sunday, July 03, 2022

Busy Bees with Silver Embossing Paste, honeycomb stencil background


I went digging inside the drawer and look what I found, this embossing paste honeycomb background.  
This stencil by is Tim Holtz and I applied Dreamweaver Stencil's silver embossing paste. Then the bee stamp is by Stampin Up. Its original stamp is the one in the center that has words coming out of his butt. I stamped the bee in yellow and cut off the sentiment.
 The hexagon punch is by Stampin Up. 
The center embellishment is stacking hexagons pointing up and down. Thank you for looking.
I'm entering the Stencil challenge at 

Saturday, July 02, 2022

Two Lawn Fawn cards with Coffee and Tea

The patterned paper on the first card is by forever and time and the writing on the paper is by Provo craft. I cut a scallop square by Spellbinders. The sentiment die is also by Spellbinders. I bought the rectangle die cut from eBay. I inked the paper with distress ink before taking it out of the metal die.
This was the Siri dictation-husband linked with the stress sink (giggle) before taking it out of the metal. The actual coffee cup is stamped into some graph paper by Project Life. The dot for the J is a sticker by Cloud Nine.
Then the second card uses patterned paper by My Mind‘s Eye, Basic Grey, and somebody else. The die cuts are by DO Crafts, Spellbinders, and Papertrey Ink. The teacup was heat embossed in white and the steam was stamped and cut out with a matching die.
I'm entering this card(s) into the AG with dies at
Happy Little Stamper

Thanks for looking.

Friday, July 01, 2022

Floral Friday Majorie’s birthday card

The only floral is on a tiny piece of patterned paper.

I stamped the butterfly stamps that came from Dollar Tree onto cream cardstock by Cricut and I colored them in with Copic Markers. I cut them out by hand and then used pop dots to adhere to the wings.

The patterned paper in this card comes from: are you ready for this? Cardstock doesn’t count. From the top-down, My Mind’s Eye. Die cuts with a View. Provo Craft. Recollections. Strathmore watercolor paper with a random color mix. Die Cuts with a View, Provo Craft, My Mind’s Eye, and Christmas paper on them both by Anna Griffin. The sentiment is an old embossing folder. It's one of the small ones and I just inked it with distress ink.

Thank for looking.

Thursday, June 30, 2022

Brown Graduation card with center PP highlight with a Copic marker

This graduation card was made with someone in mind and then I couldn't find it. So, He got a different card. The background paper is by The Paper Studio AKA Hobby Lobby. The center piece of paper is by Best Creations. The graduation caps didn't stand out enough so I traced around them with a fine tip Copic marker.  I finished the card with a few stars sequins. Thanks for stopping by.